
Godot Multiplayer Networking: Hosting a dedicated server on AWS EC2
May 06, 2025This guide will cover:
- Launching your AWS EC2 instance
- Setting up your Godot project for export
- Running the dedicated server on the instance
What this guide does not cover:
- Implementing multiplayer in your game using Godot's High Level Multiplayer. To learn how to make multiplayer games in Godot, check out BatteryAcidDev on YouTube and his getting started videos like Add Multiplayer to your Godot Game. He also has a dedicated server tutorial if you'd prefer this subject in video form.
Pre-requisites:
- An AWS account
- A Godot game with multiplayer with
gitenabled - Basic understanding of
sshand the terminal
AWS Steps 📷
(All images are at the bottom. Click the 📷 in each section title to see them.)
In this section we will make:
- A security group
- An EC2 instance (
t4g.nano)** - An Elastic IP Address
** Note: See footnotes about my instance choice & costs
- Log into AWS
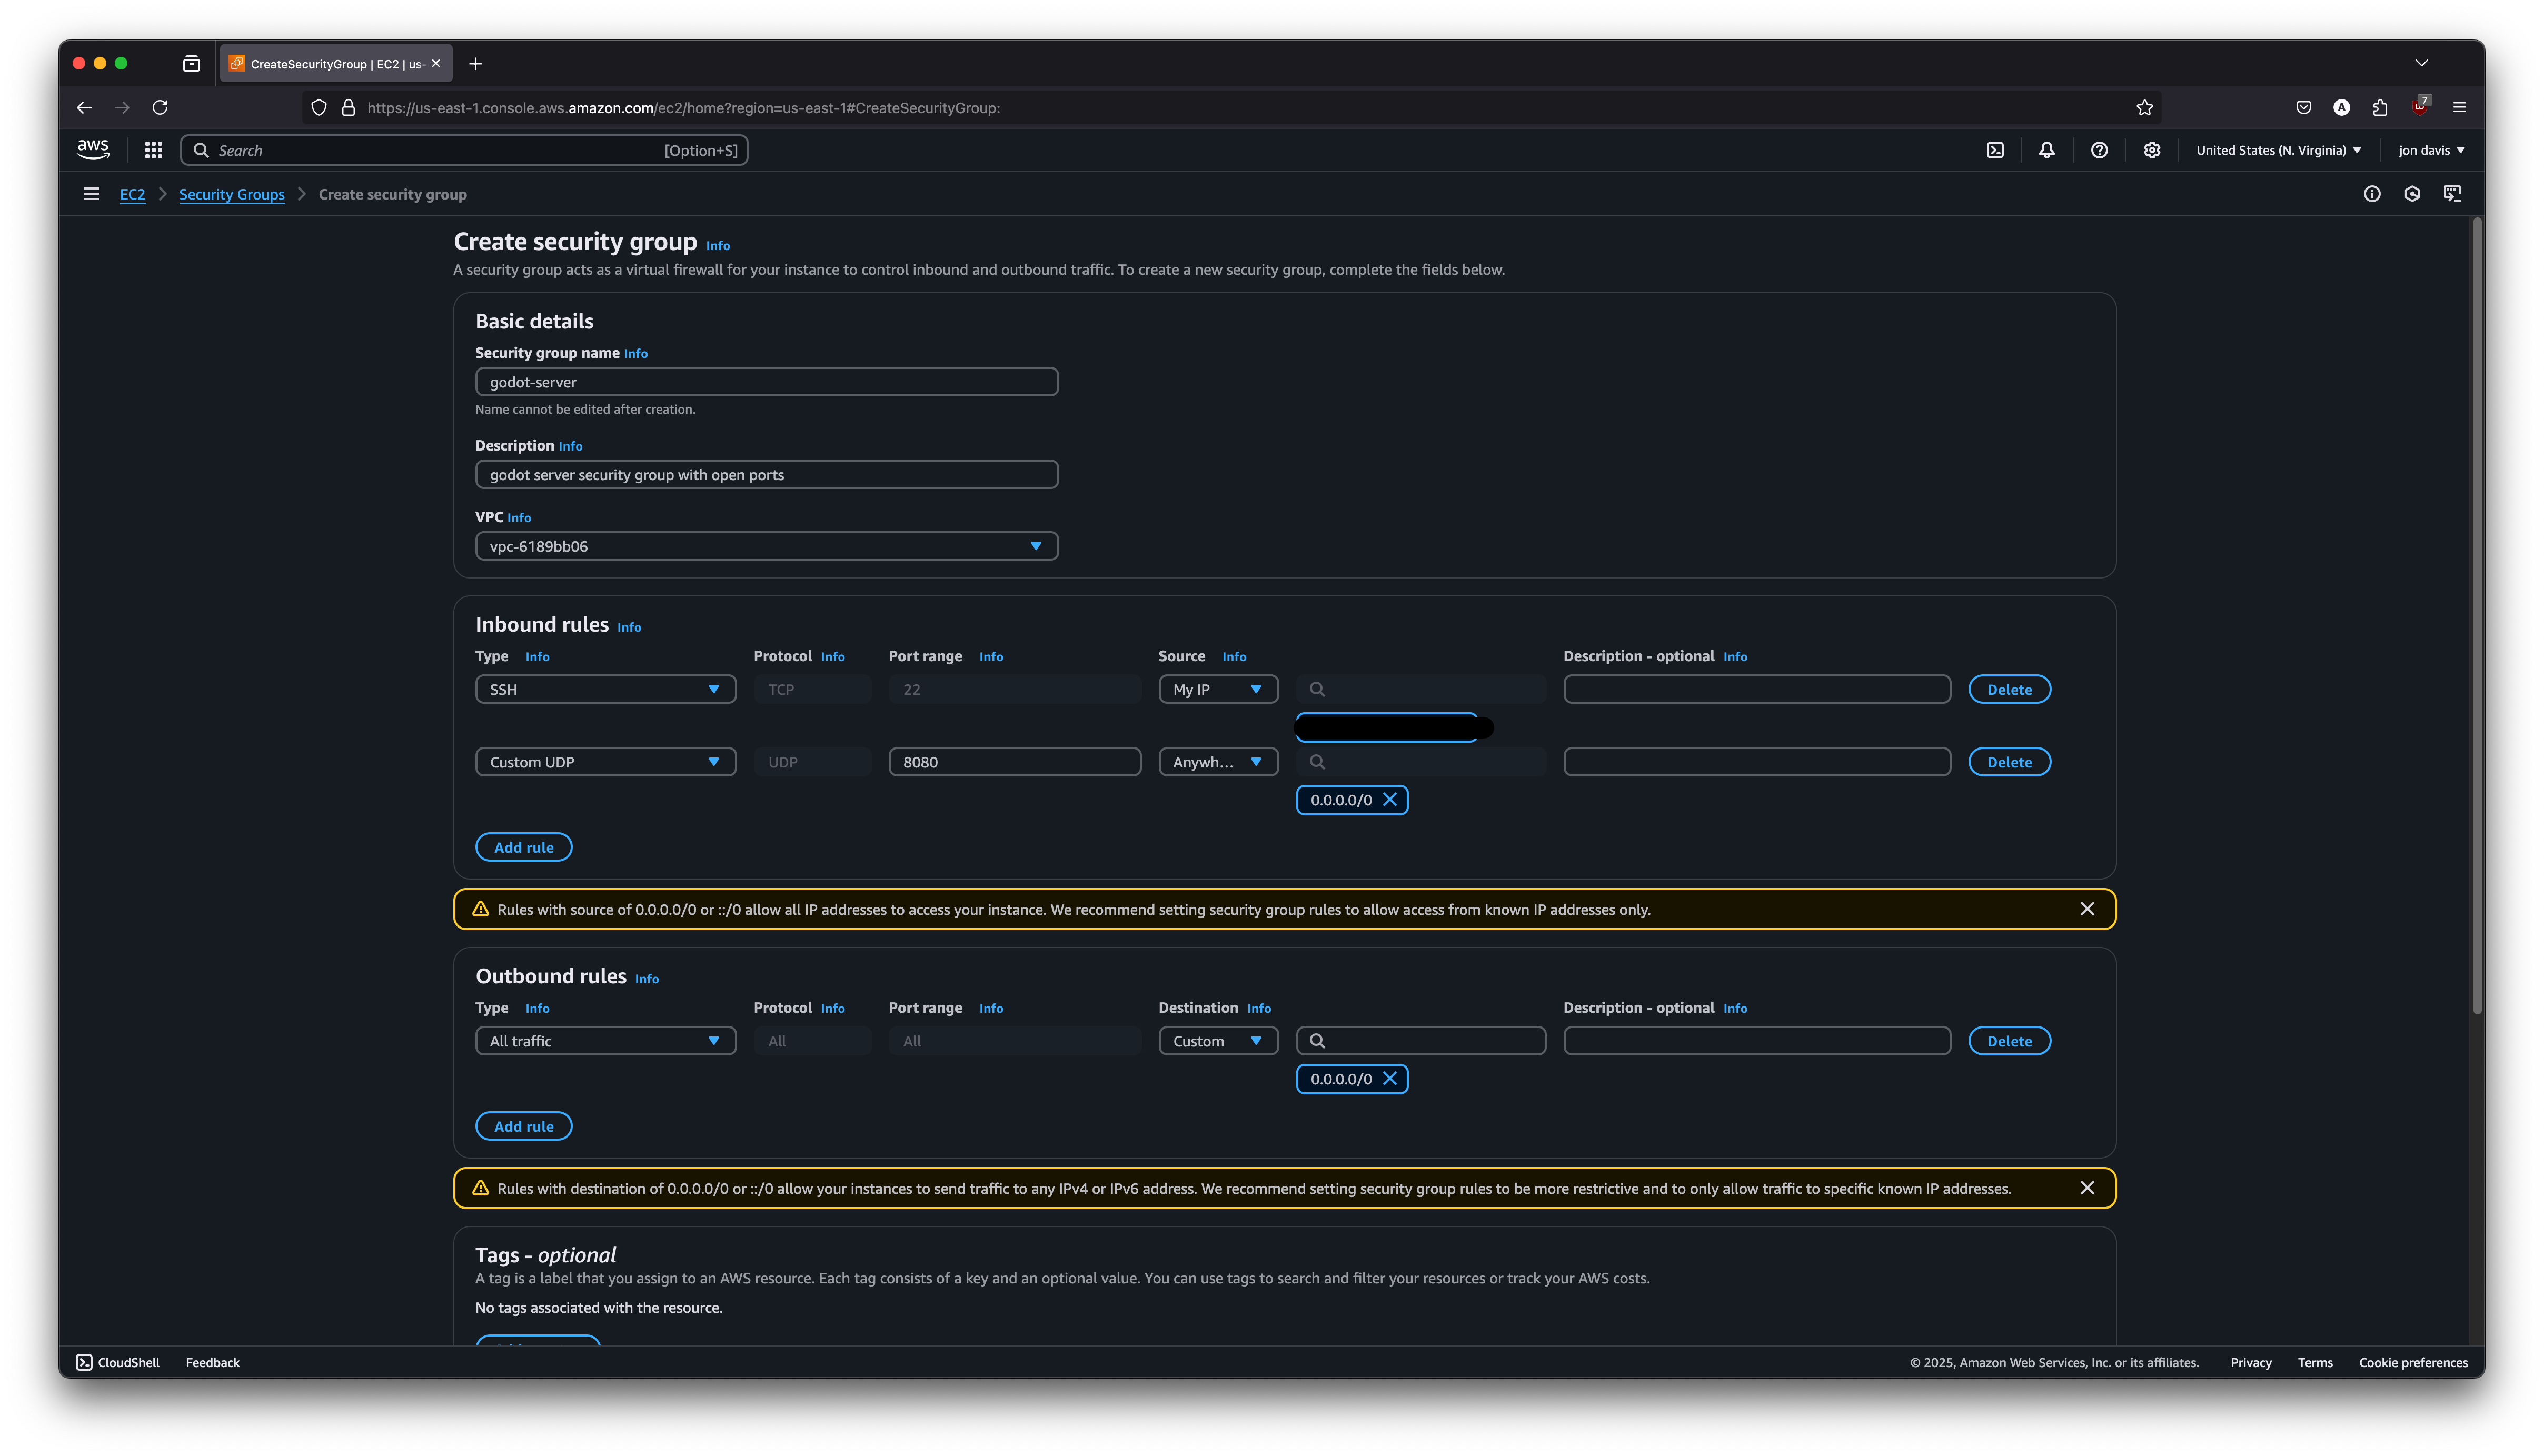
- Navigate to EC2 -> Security Groups
- Top right: Create security group
- Security group name:
godot-server - Description:
"godot server security group with open ports" - Add Inbound Rule:
SSH, Source:My IP - Add Inbound Rule:
Custom UDP, Port:8080, Source:Anywhere 0.0.0.0/0 - Click Create
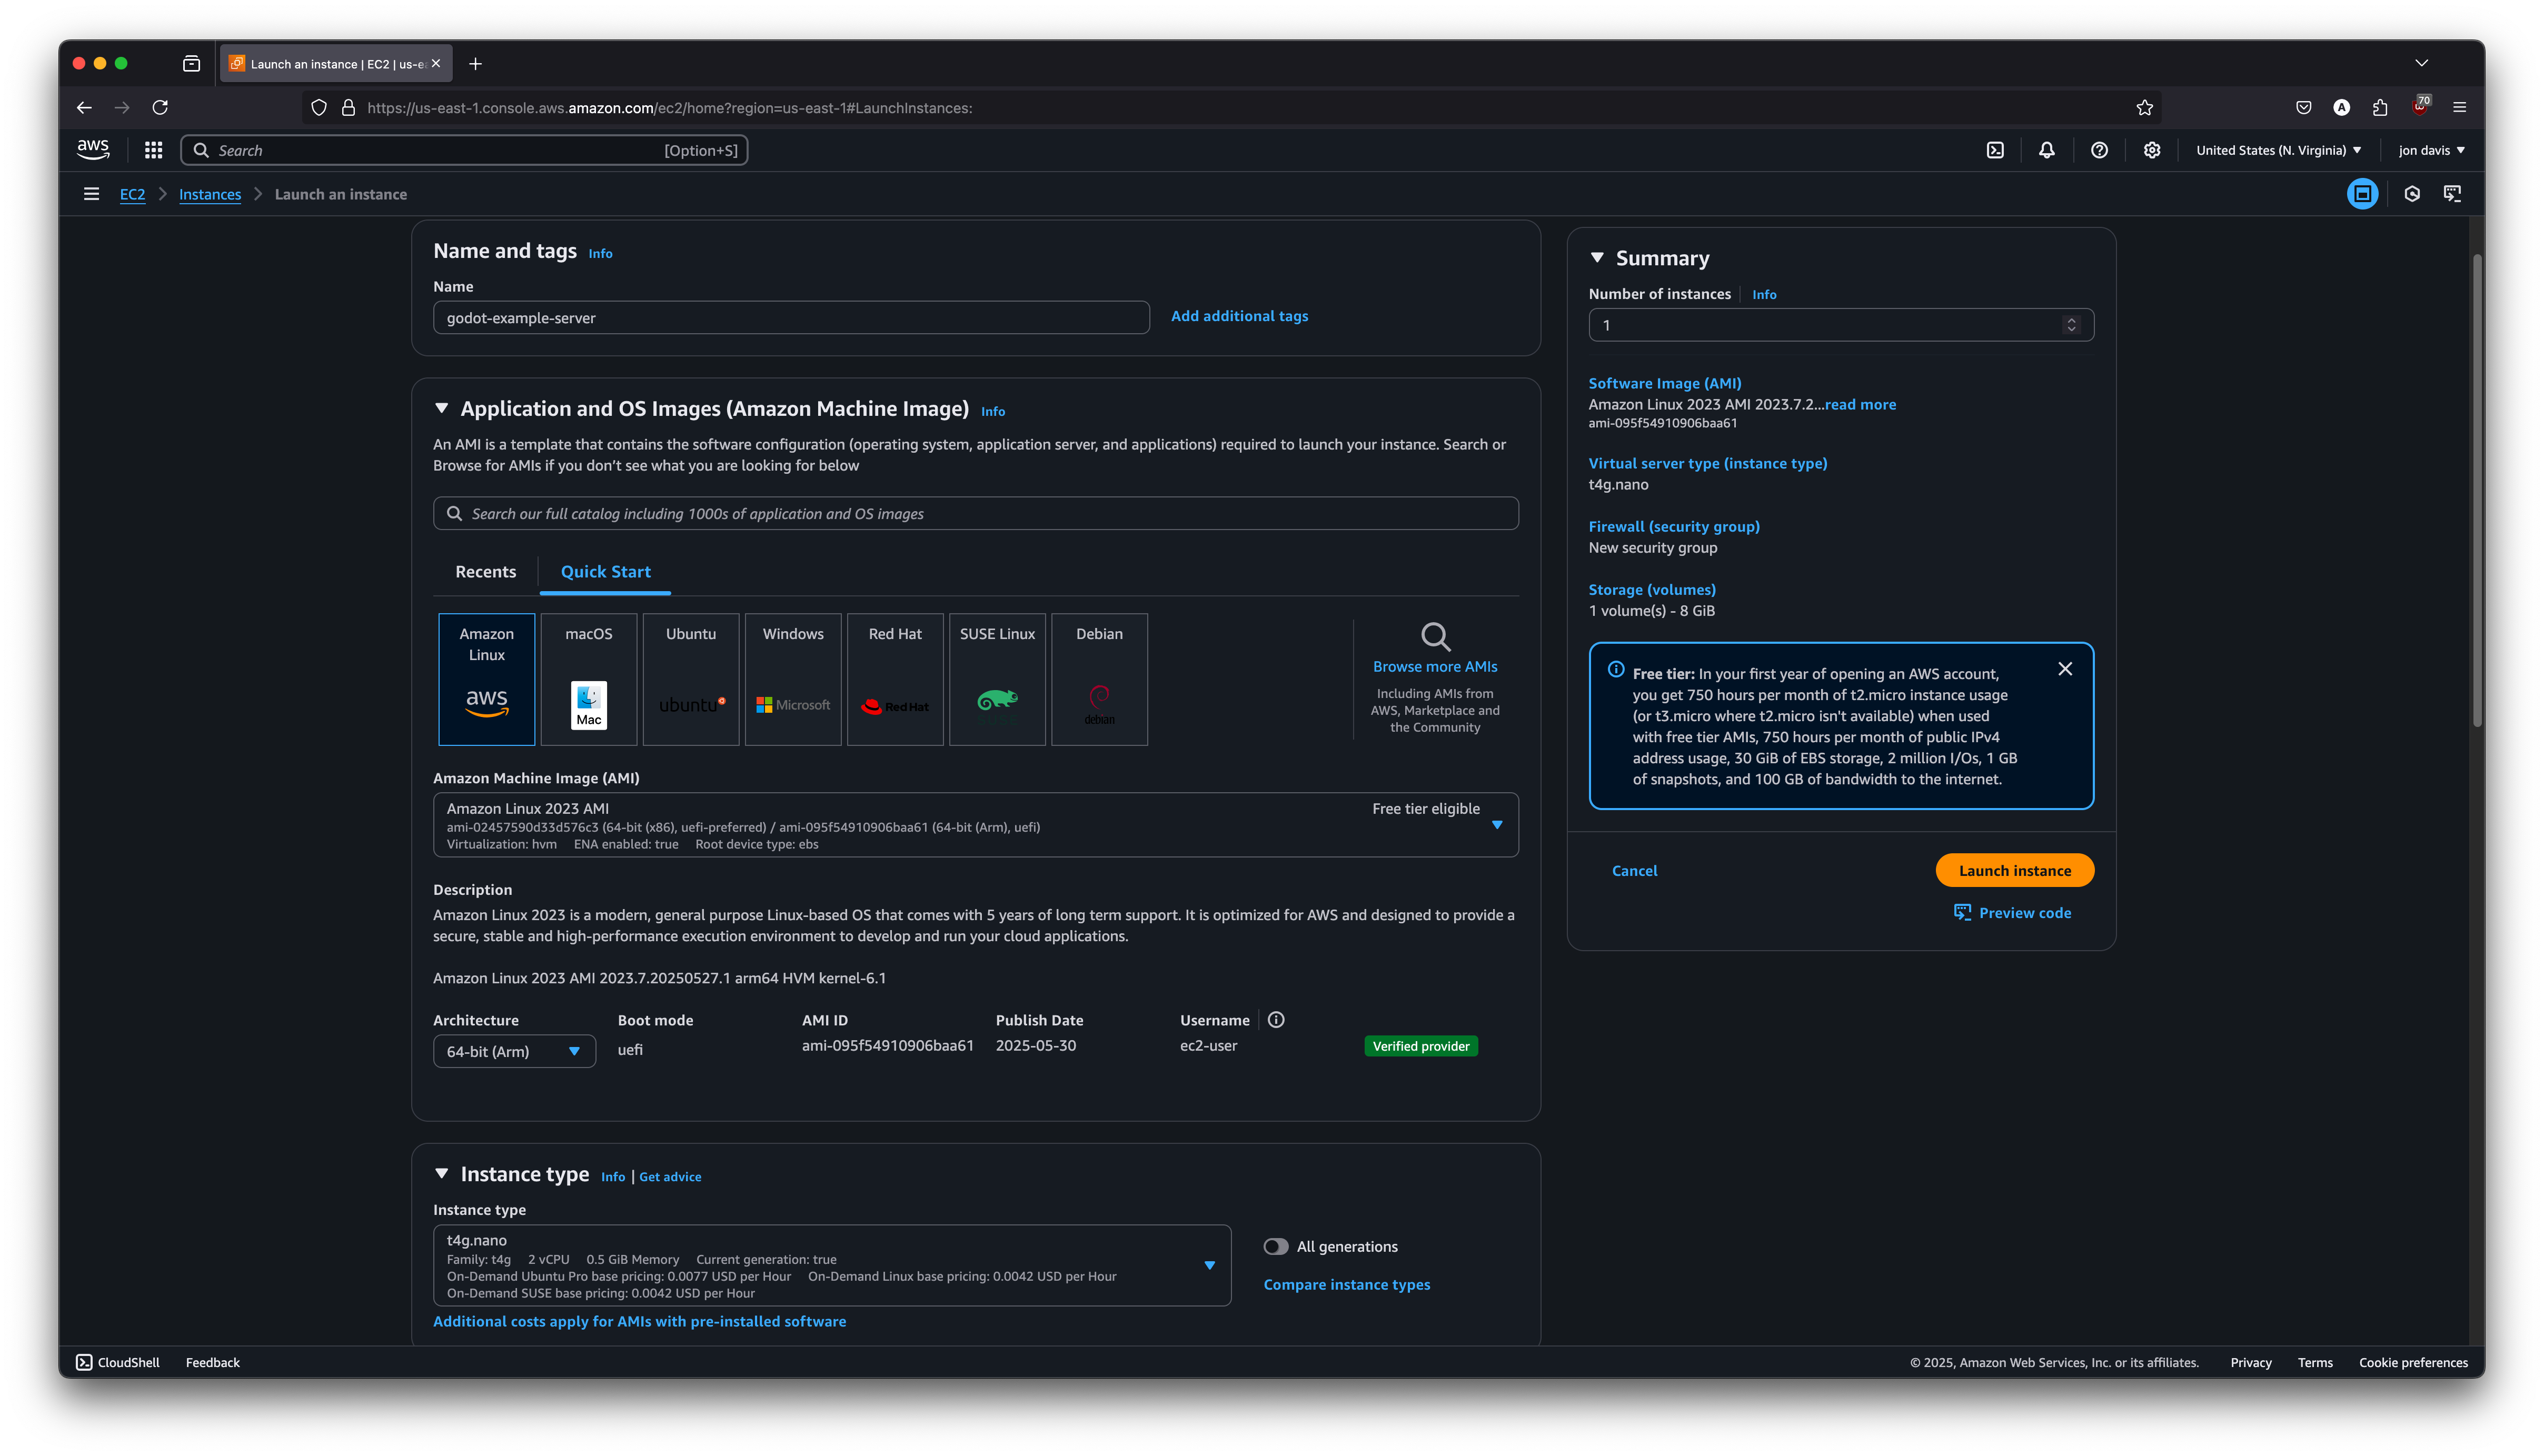
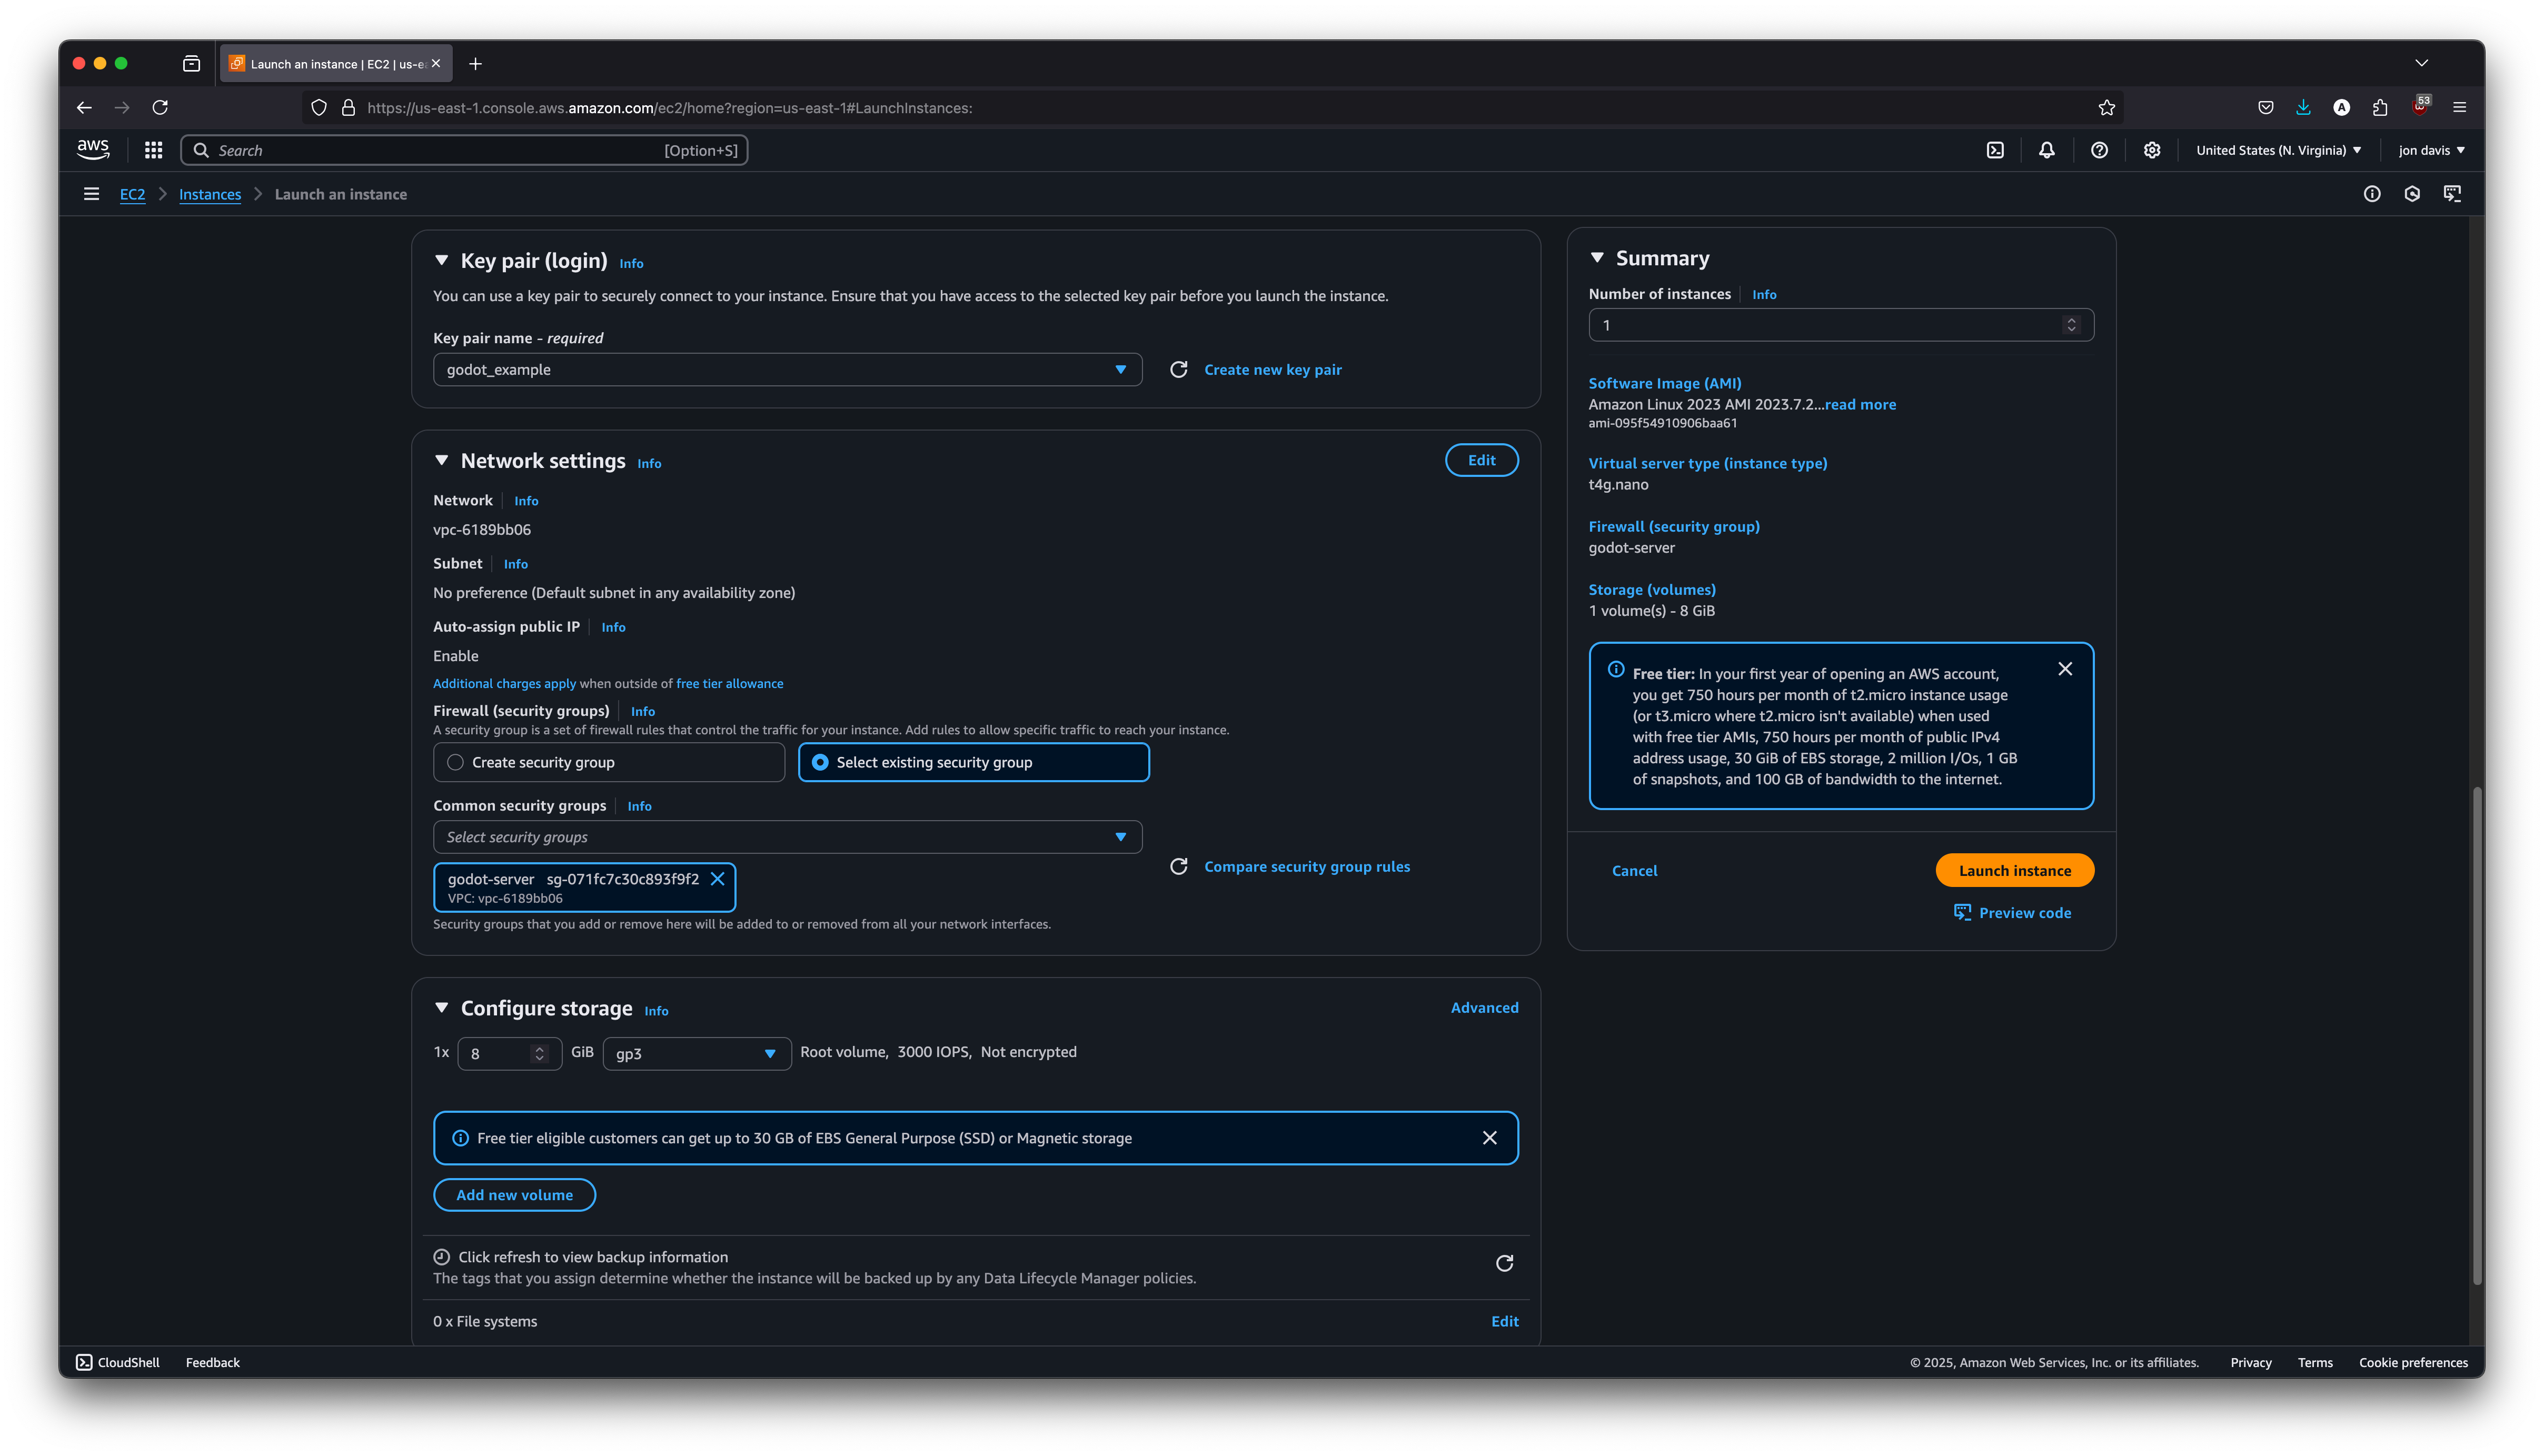
- Navigate to EC2 -> Create Instance
- Instance Name:
godot-server - Architecture:
64-bit (Arm) - Instance Type:
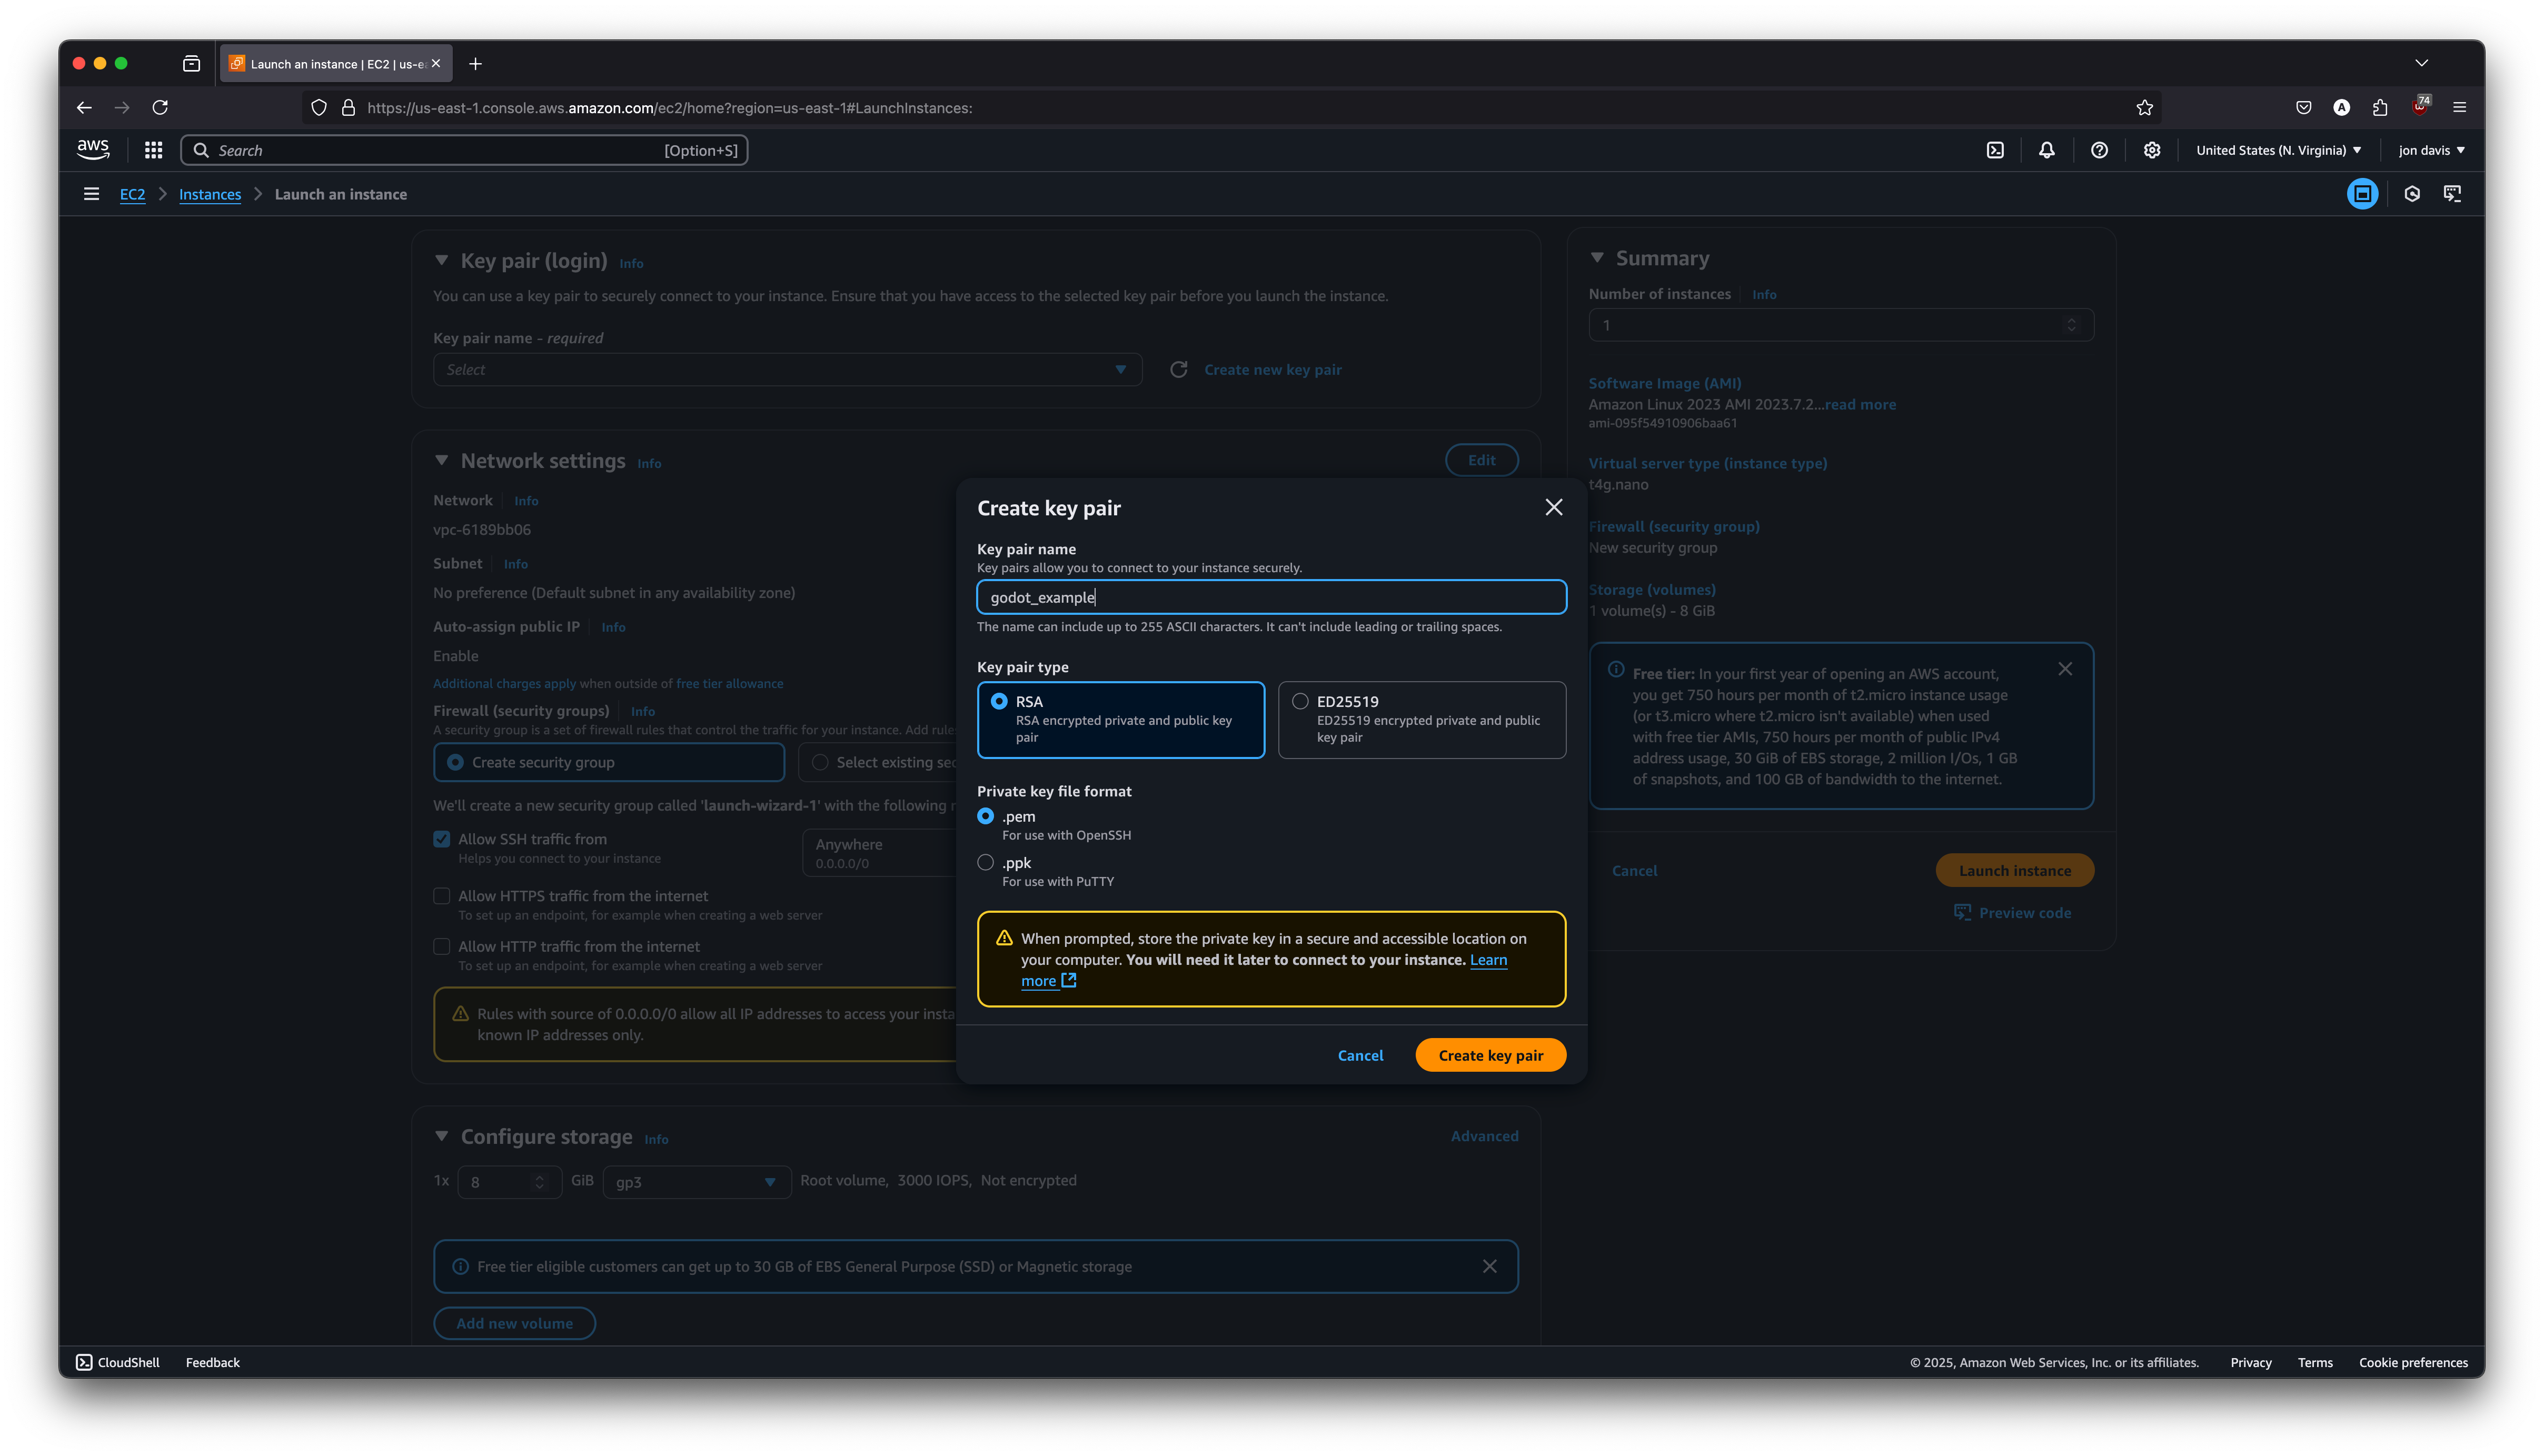
t4g.nano - Create a new key pair:
godot-example.pem& download - Select Existing Security Group:
godot-serverwe made above - Click Launch
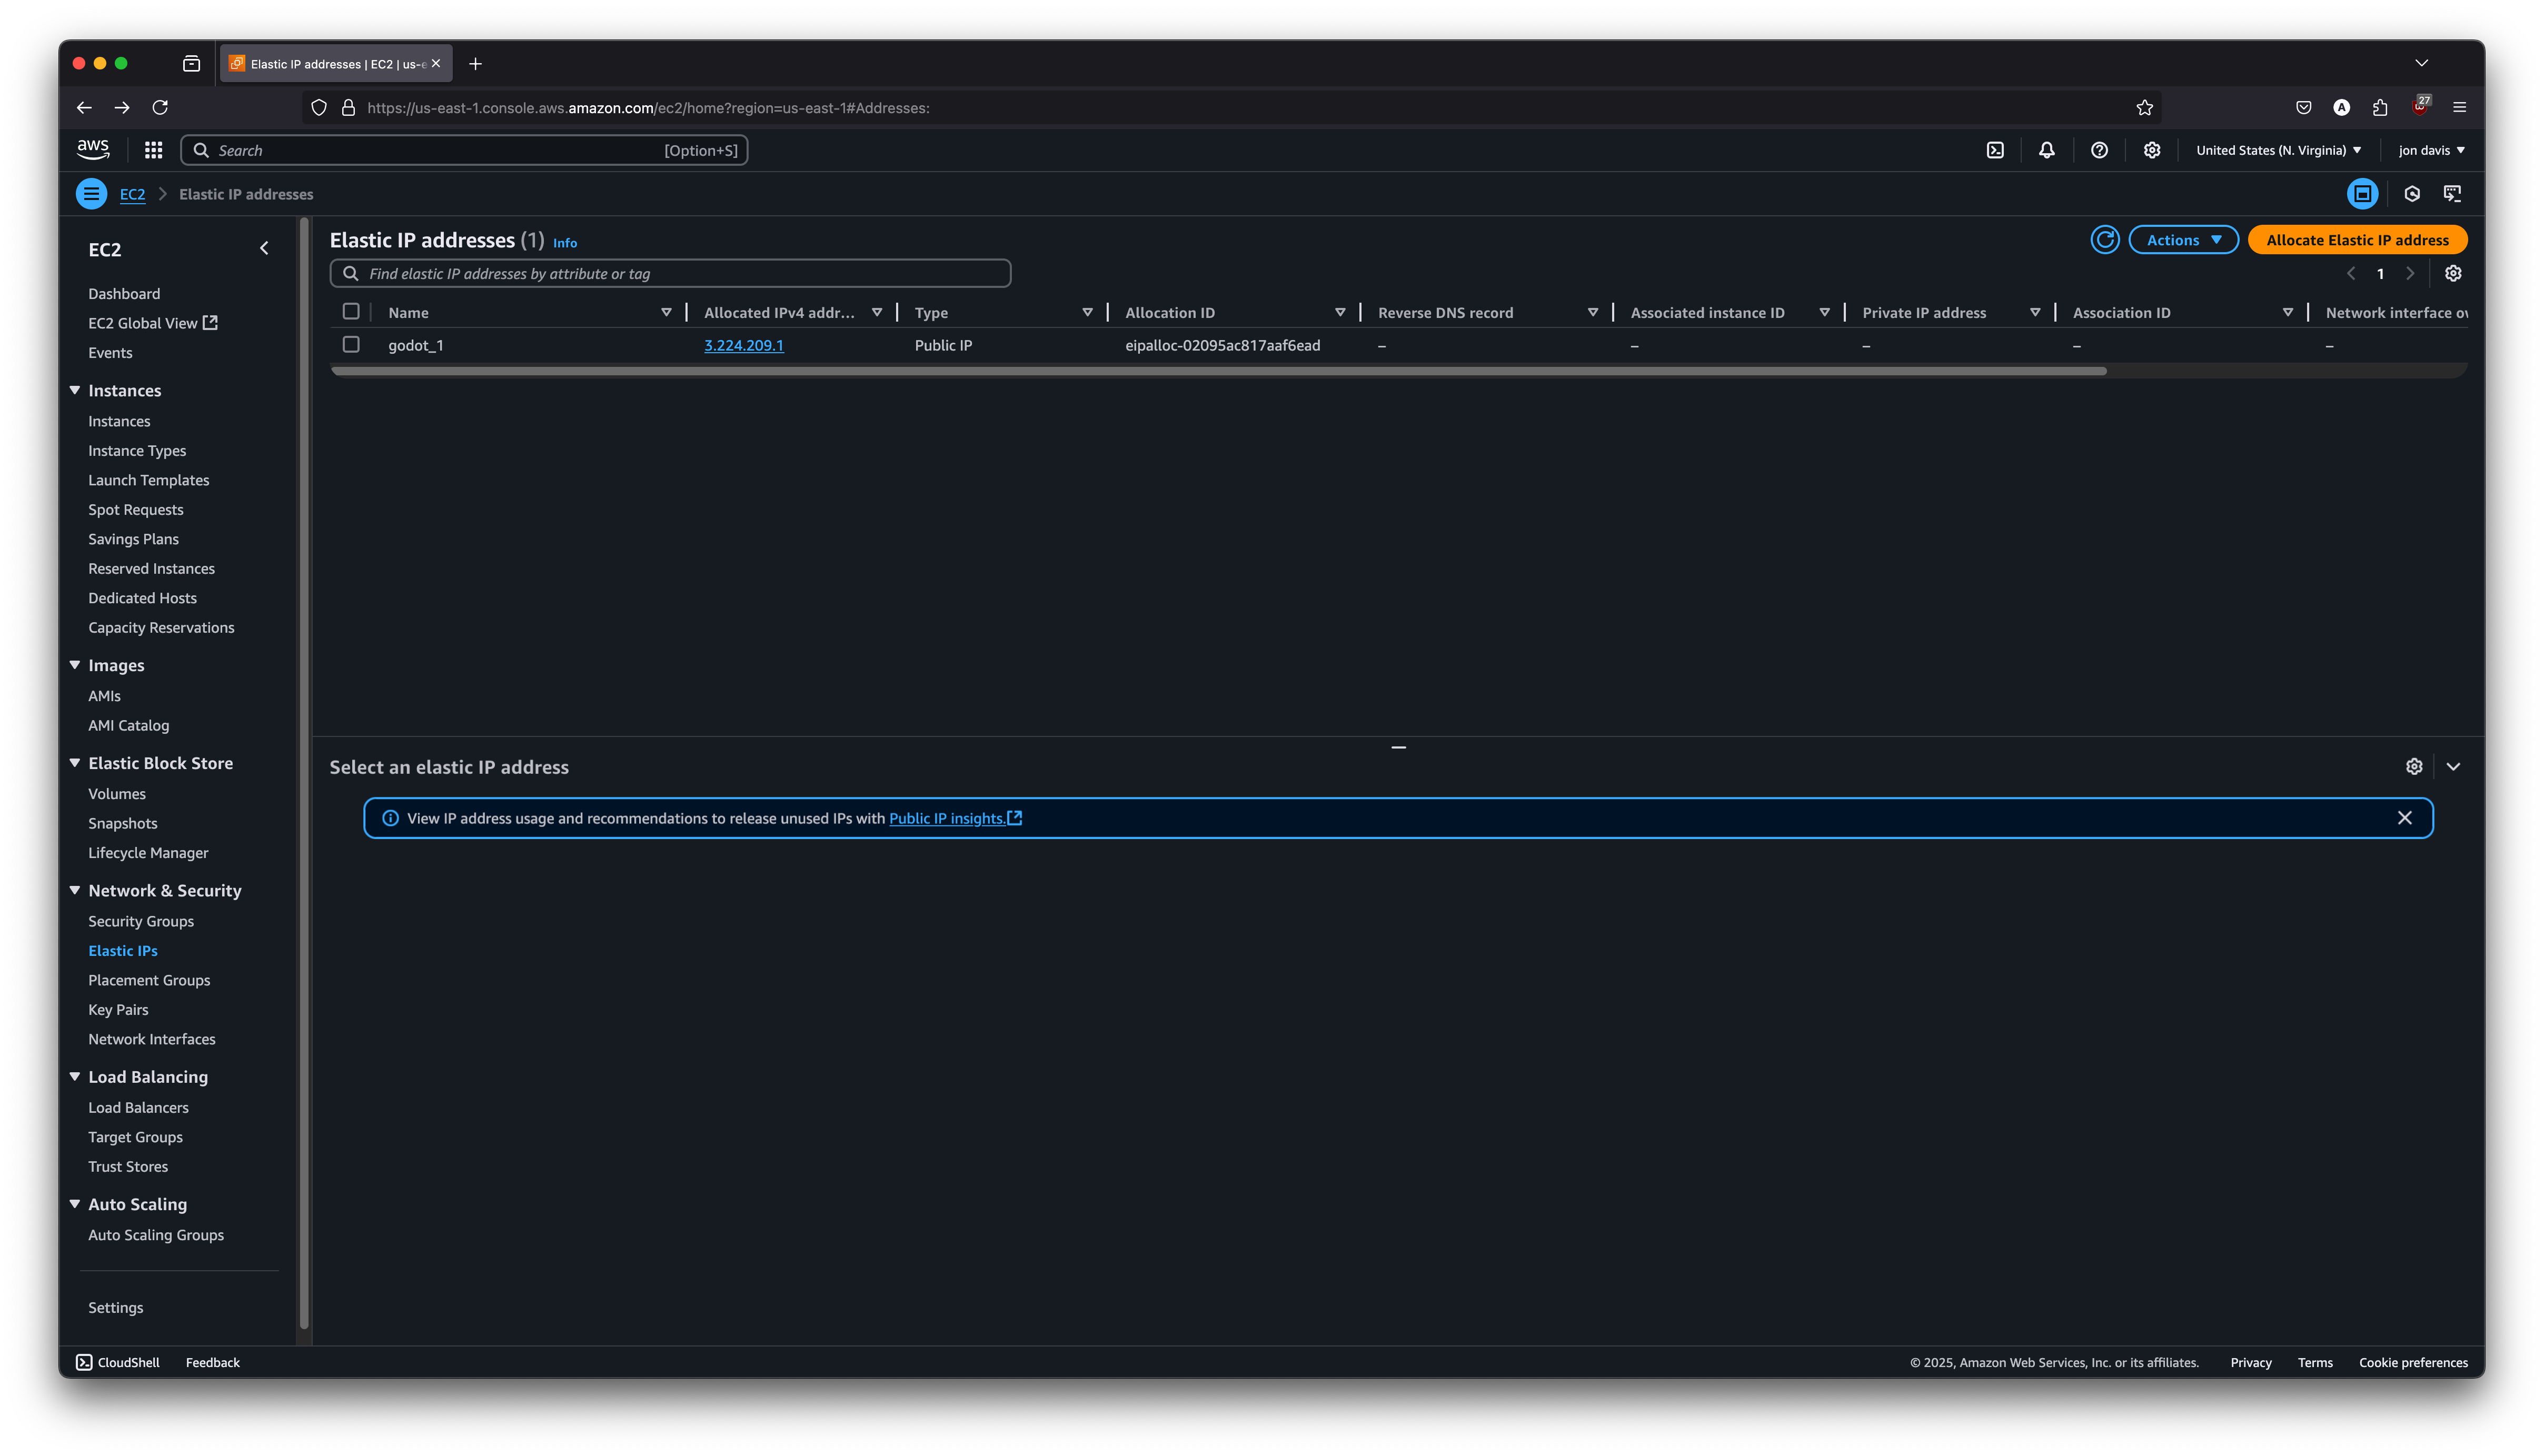
- Navigate to VPC -> Elastic IP addresses
- Click Allocate Elastic IP Address
- Select:
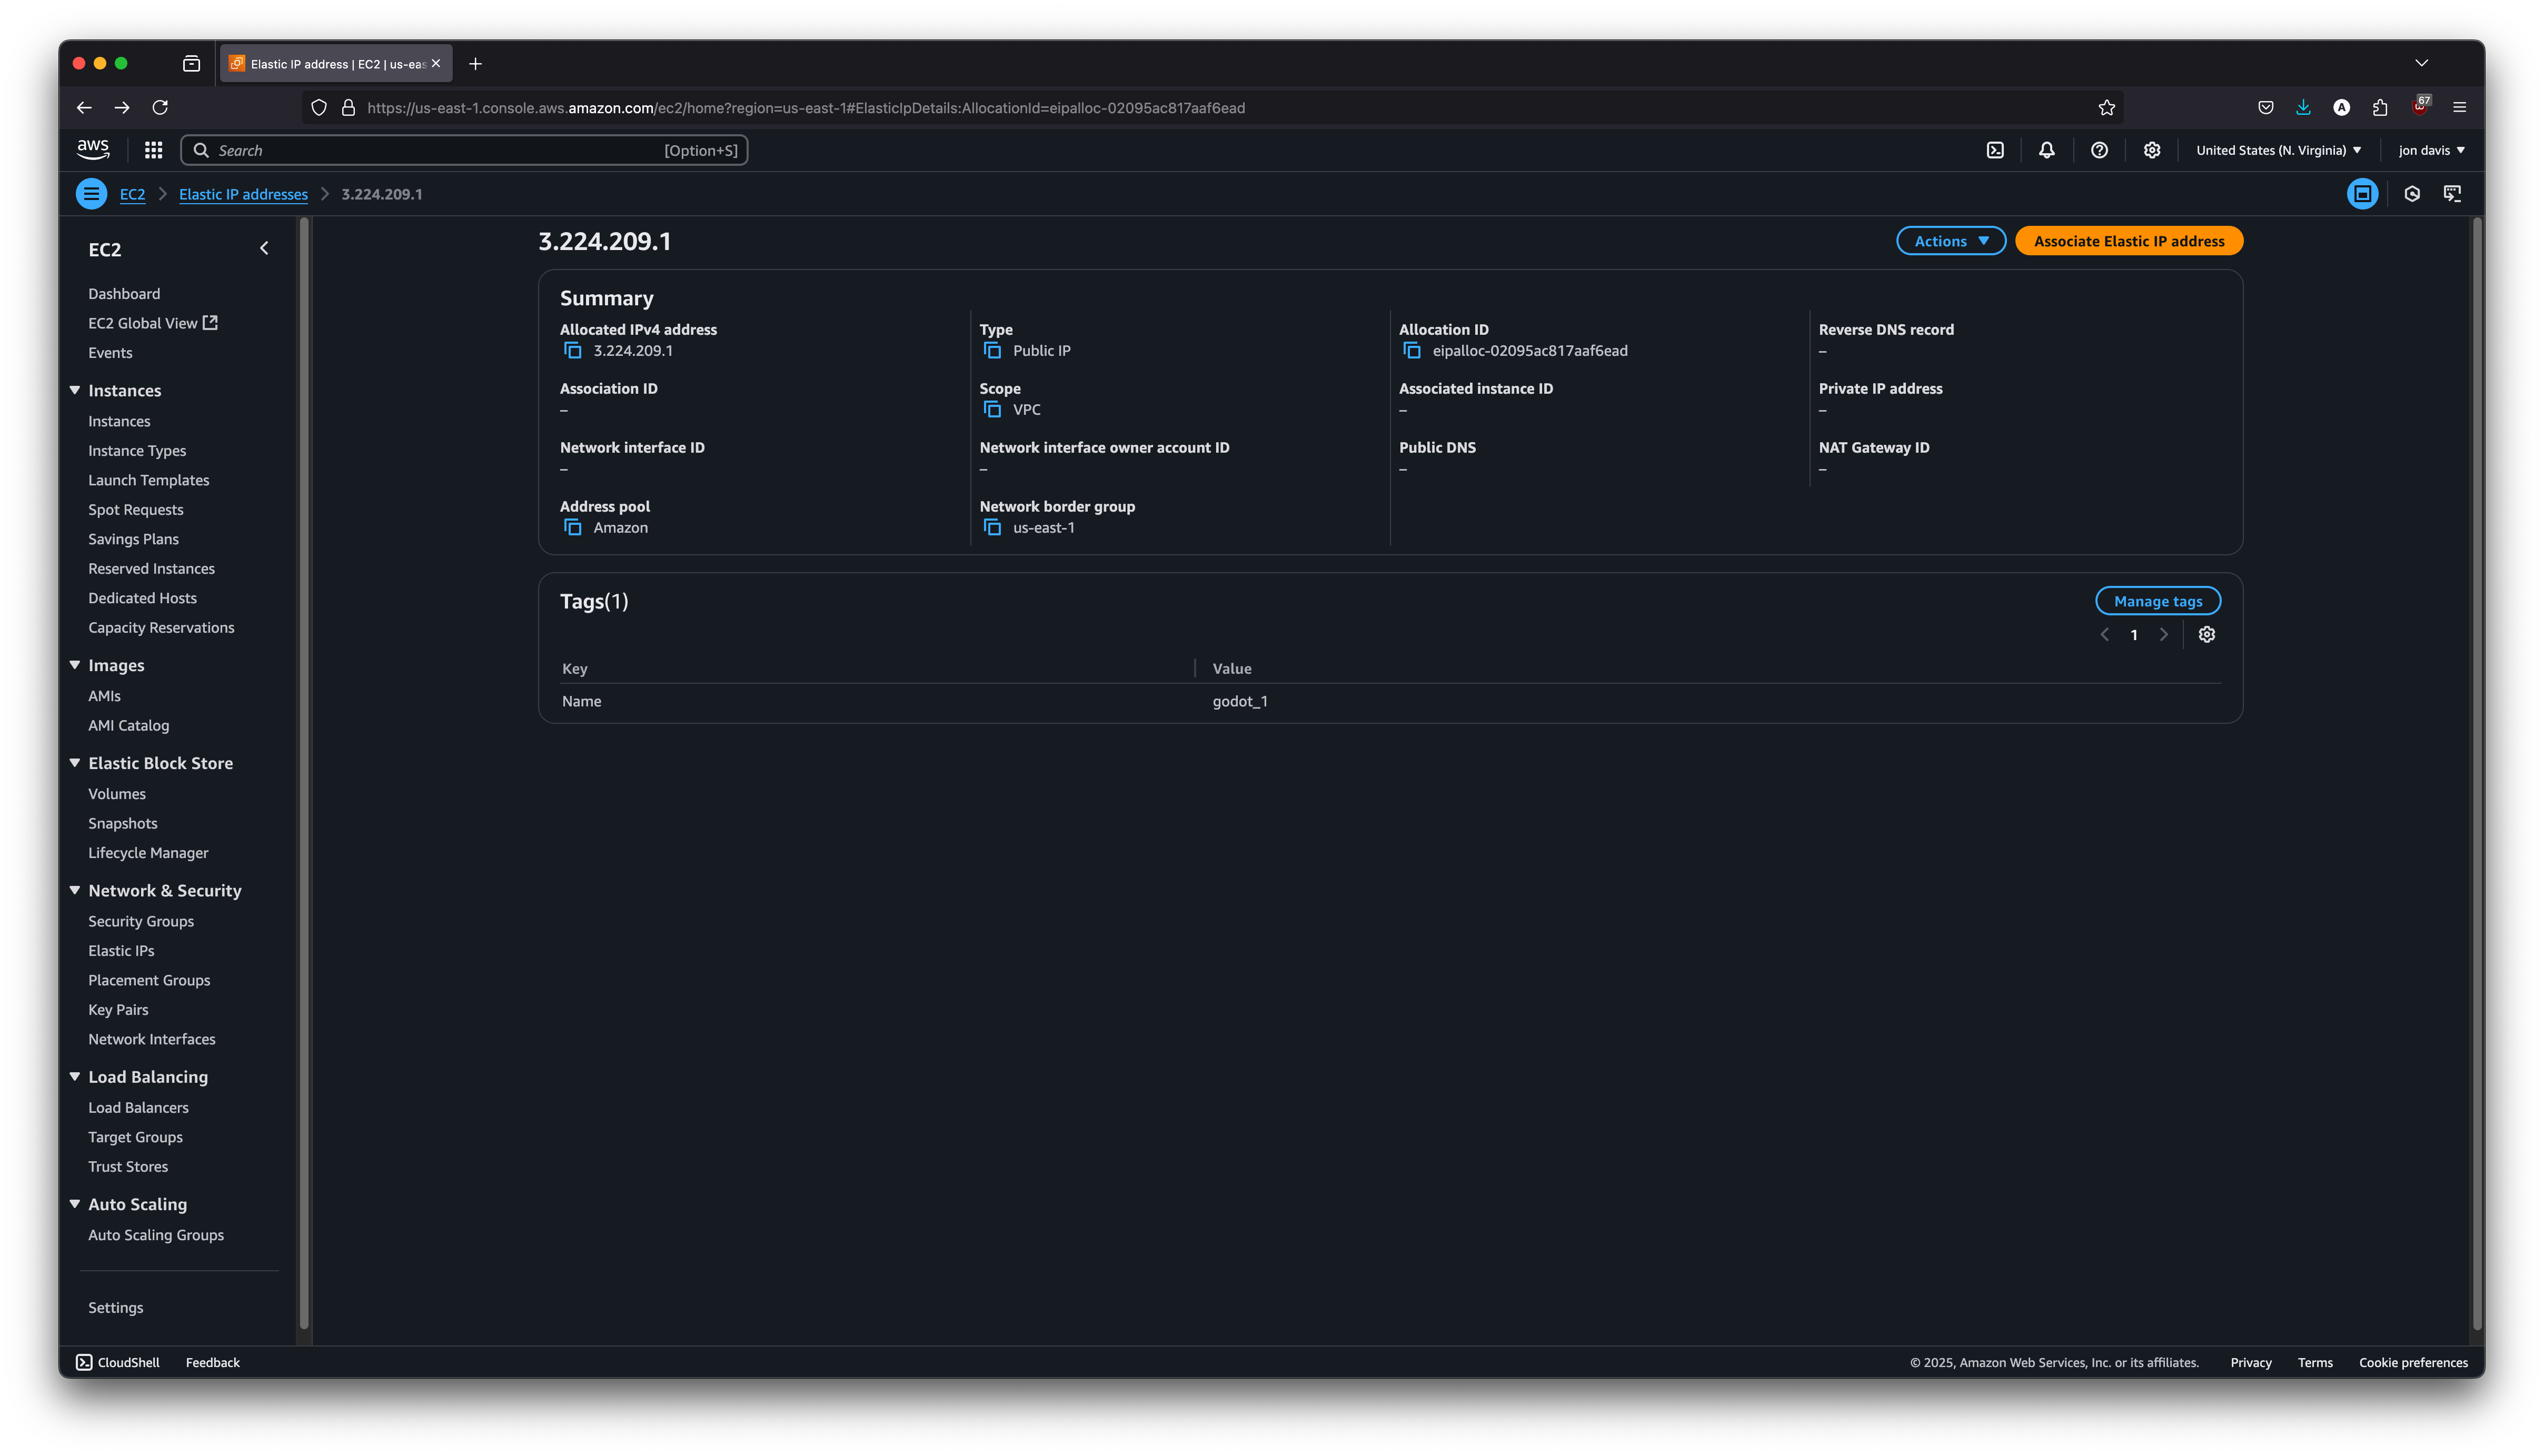
Amazon's pool of IPv4 addresses(default) and allocate it - Navigate into your newly created IP
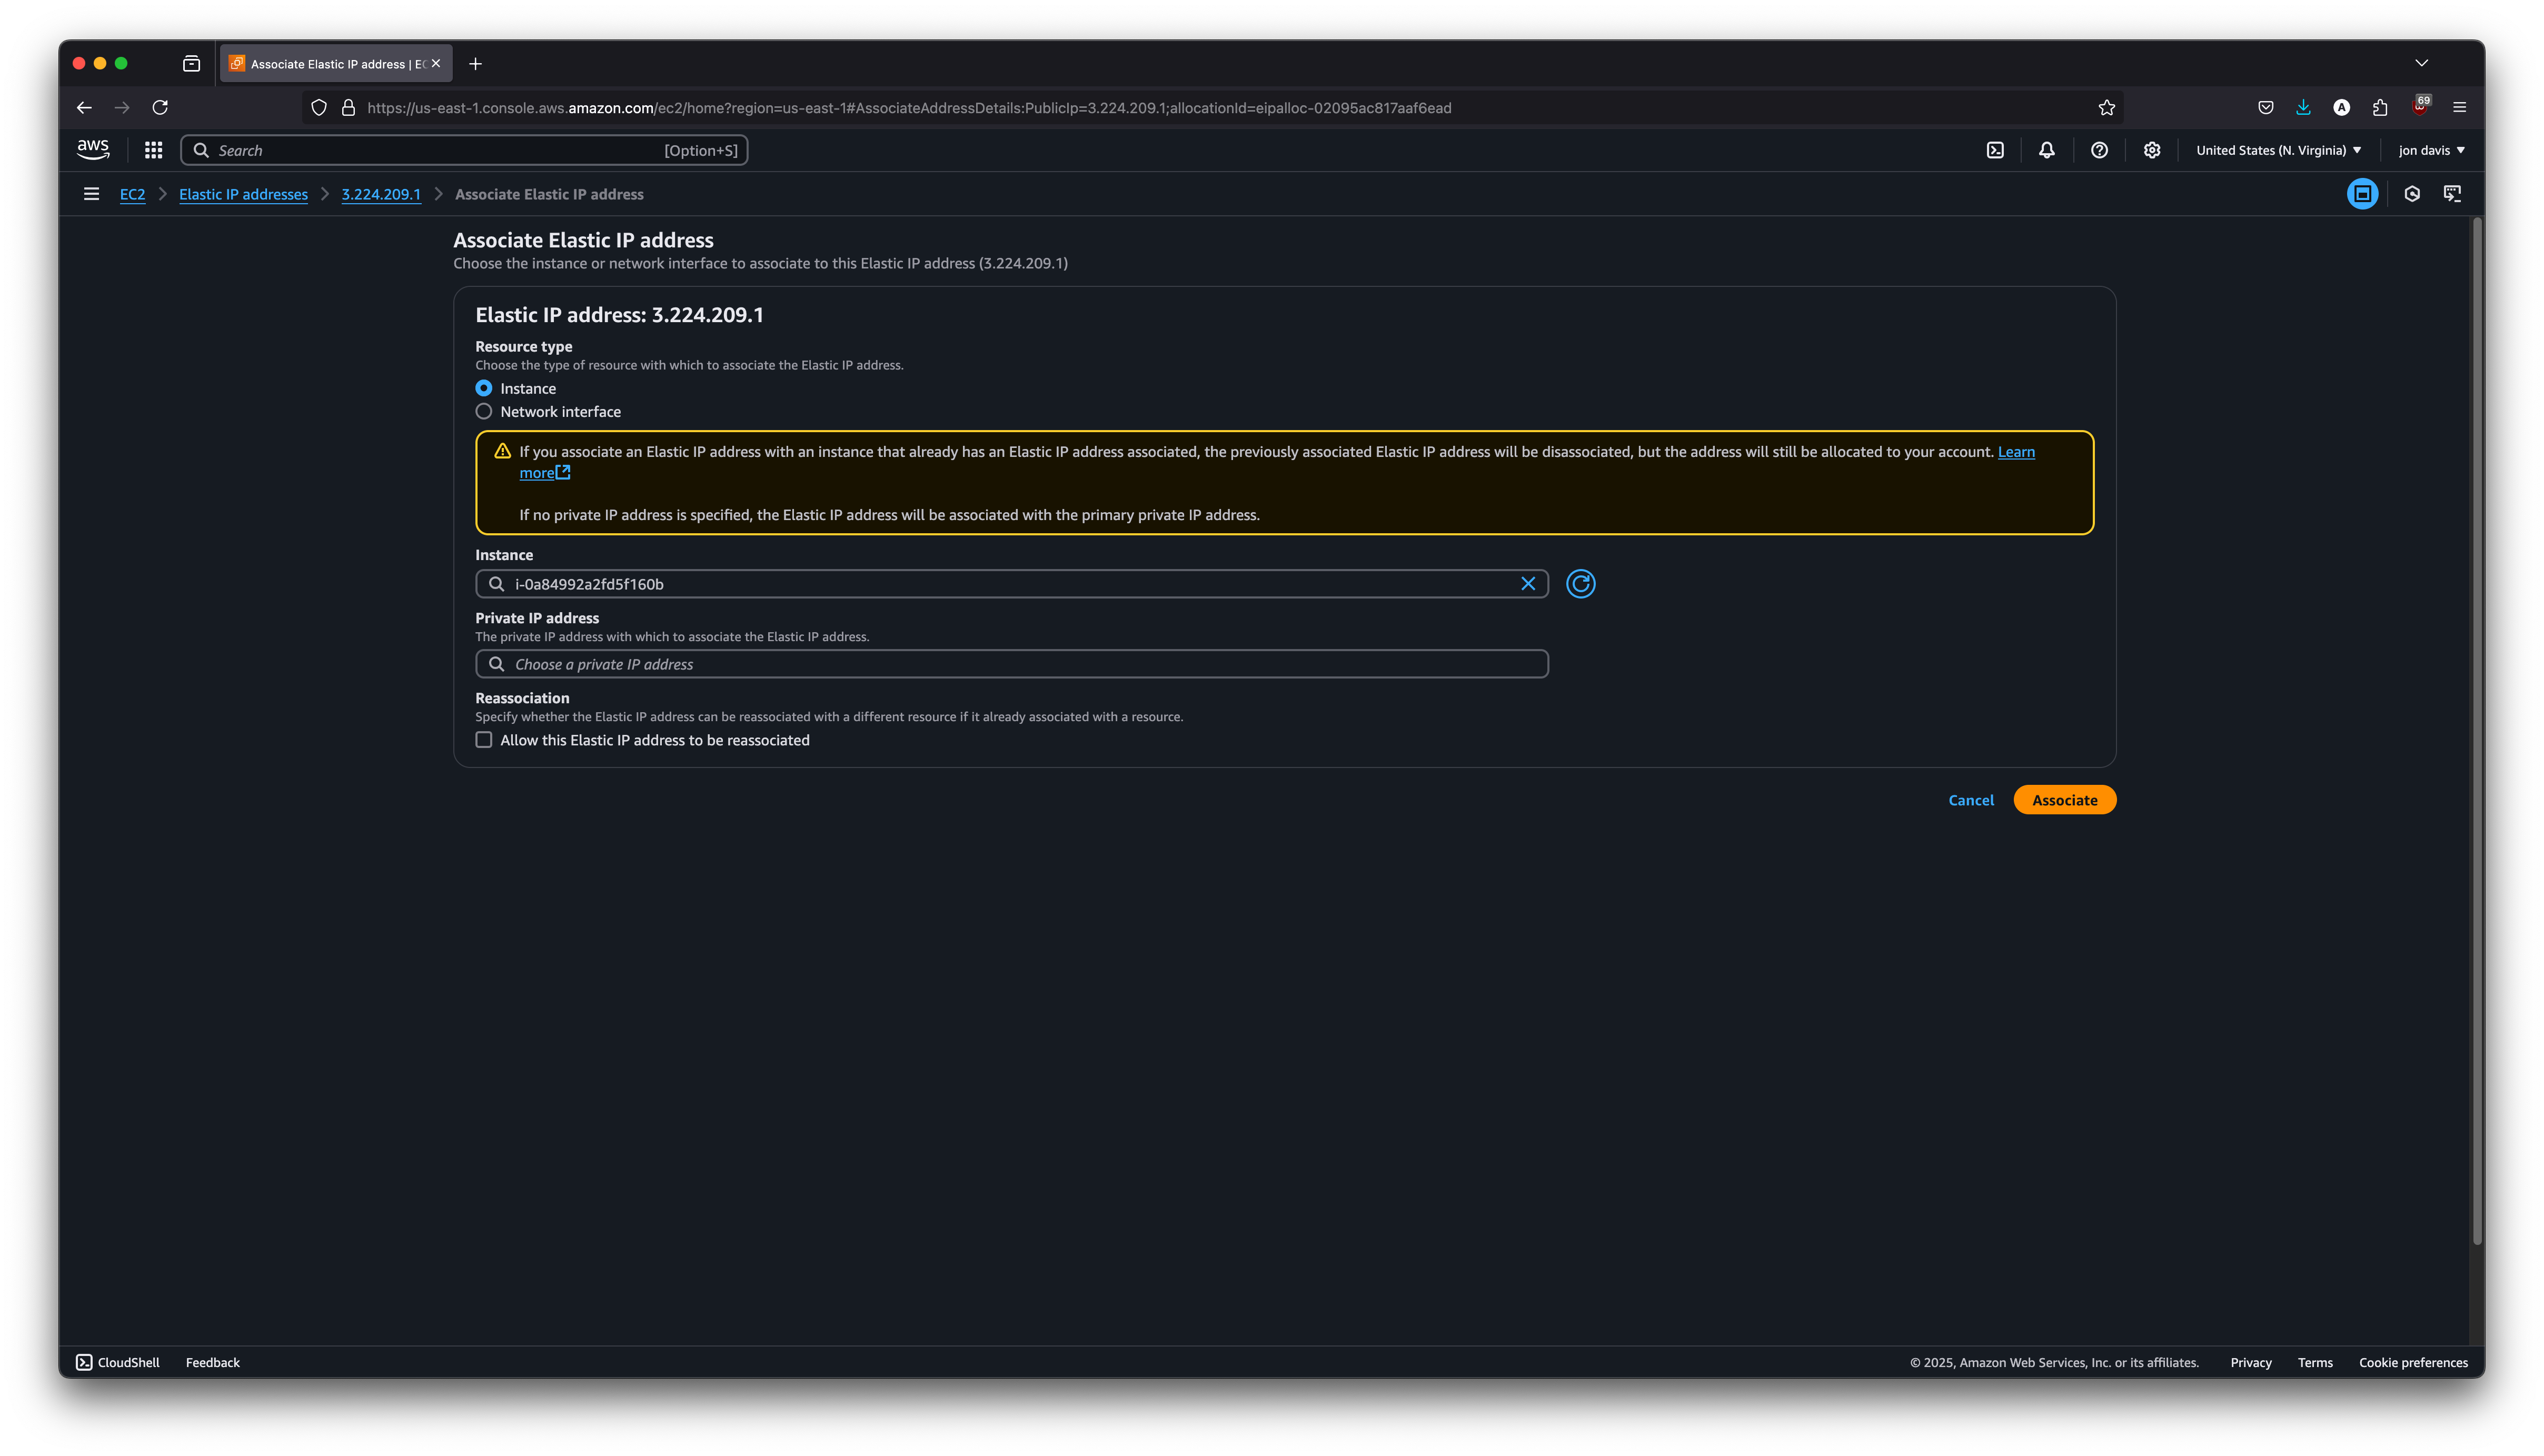
- Click Associate Elastic IP address
- Select:
Instance(default) - Choose: Your
godot-servercreated above - Click Associate
Terminal Steps 📷
The next section uses commands that should have their values replaced.
dist/tundra_server.arm64->dist/your_game_name_server.arm64Your game's name3.224.219.2->YOUR_ELASTIC_IPcopied from AWSGodot_v4.5-dev5_linux.arm64->Godot_v4.4.1-stable_linux.arm64your version of Godot from the downloads.
Here are the commands. Copy them to a text editor & replace each of the values, IPs, Godot versions with your choices as you go & save it. In the future I may make a tool to speed this up, but this works for now.
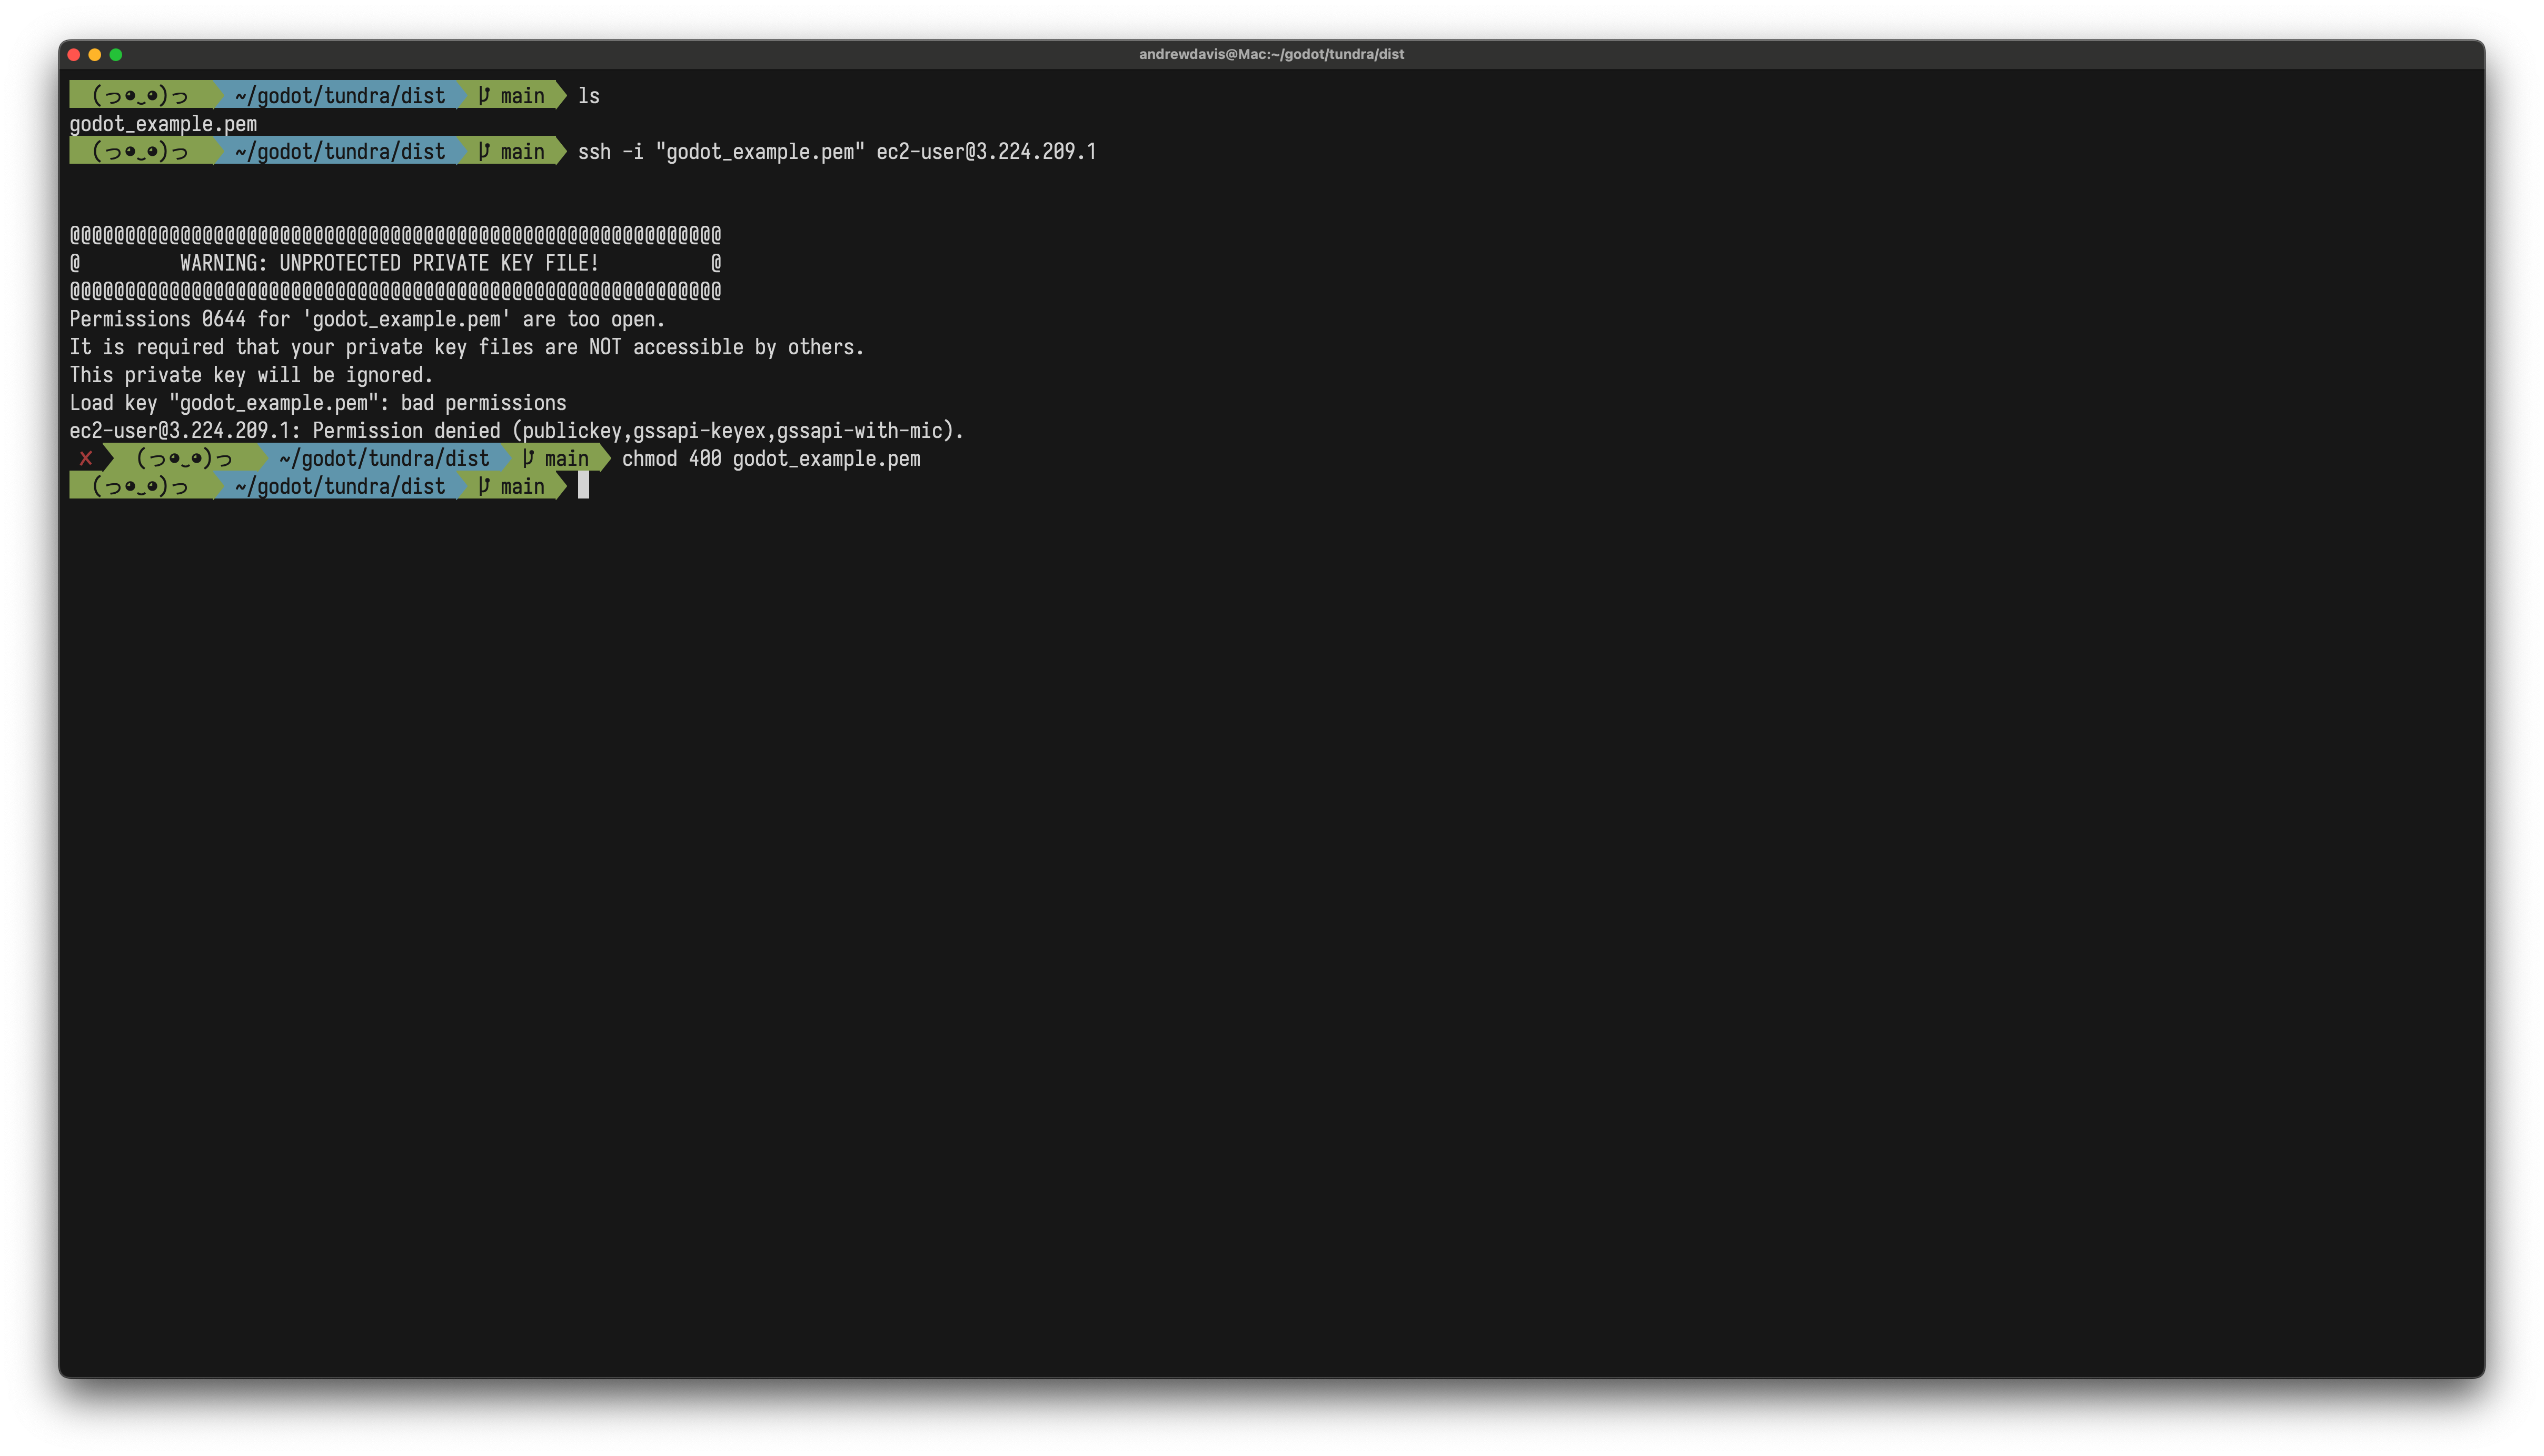
chmod 400 godot_example.pem

ssh -i "godot_example.pem" ec2-user@3.224.219.2

sudo yum install wget && sudo yum install unzip && wget https://github.com/godotengine/godot-builds/releases/download/4.5-dev5/Godot_v4.5-dev5_linux.arm64.zip && unzip Godot_v4.5-dev5_linux.arm64.zip

scp -i godot_example.pem tundra_server.arm64 ec2-user@3.224.219.2:/home/ec2-user/

./Godot_v4.5-dev5_linux.arm64 --main-pack tundra_server.arm64 --headless  -- server
- Open your Godot game folder in a text editor
- In your
.gitignoreadddist/*and*.pemto be safe (prevents you from accidently exposing your .pem or server files) - Save,
git add .andgit commit -m "update .gitignore with dist"andgit push mkdir dist- Move the
godot_example.pemyou downloaded into/dist cd distls, you should see just the.pem- Run
chmod 400 godot_example.pem- If you're on Windows, use this Stack Overflow or this video on icacls
- If you fail to do the
chmodoricaclssteps you will see this:
@@@@@@@@@@@@@@@@@@@@@@@@@@@@@@@@@@@@@@@@@@@@@@@@@@@@@@@@@@@
@         WARNING: UNPROTECTED PRIVATE KEY FILE!          @
@@@@@@@@@@@@@@@@@@@@@@@@@@@@@@@@@@@@@@@@@@@@@@@@@@@@@@@@@@@
Permissions for 'mykey.pem' are too open.
It is required that your private key files are NOT accessible by others.
This private key will be ignored.
- Given your
.pemhas the right permissions... - Run
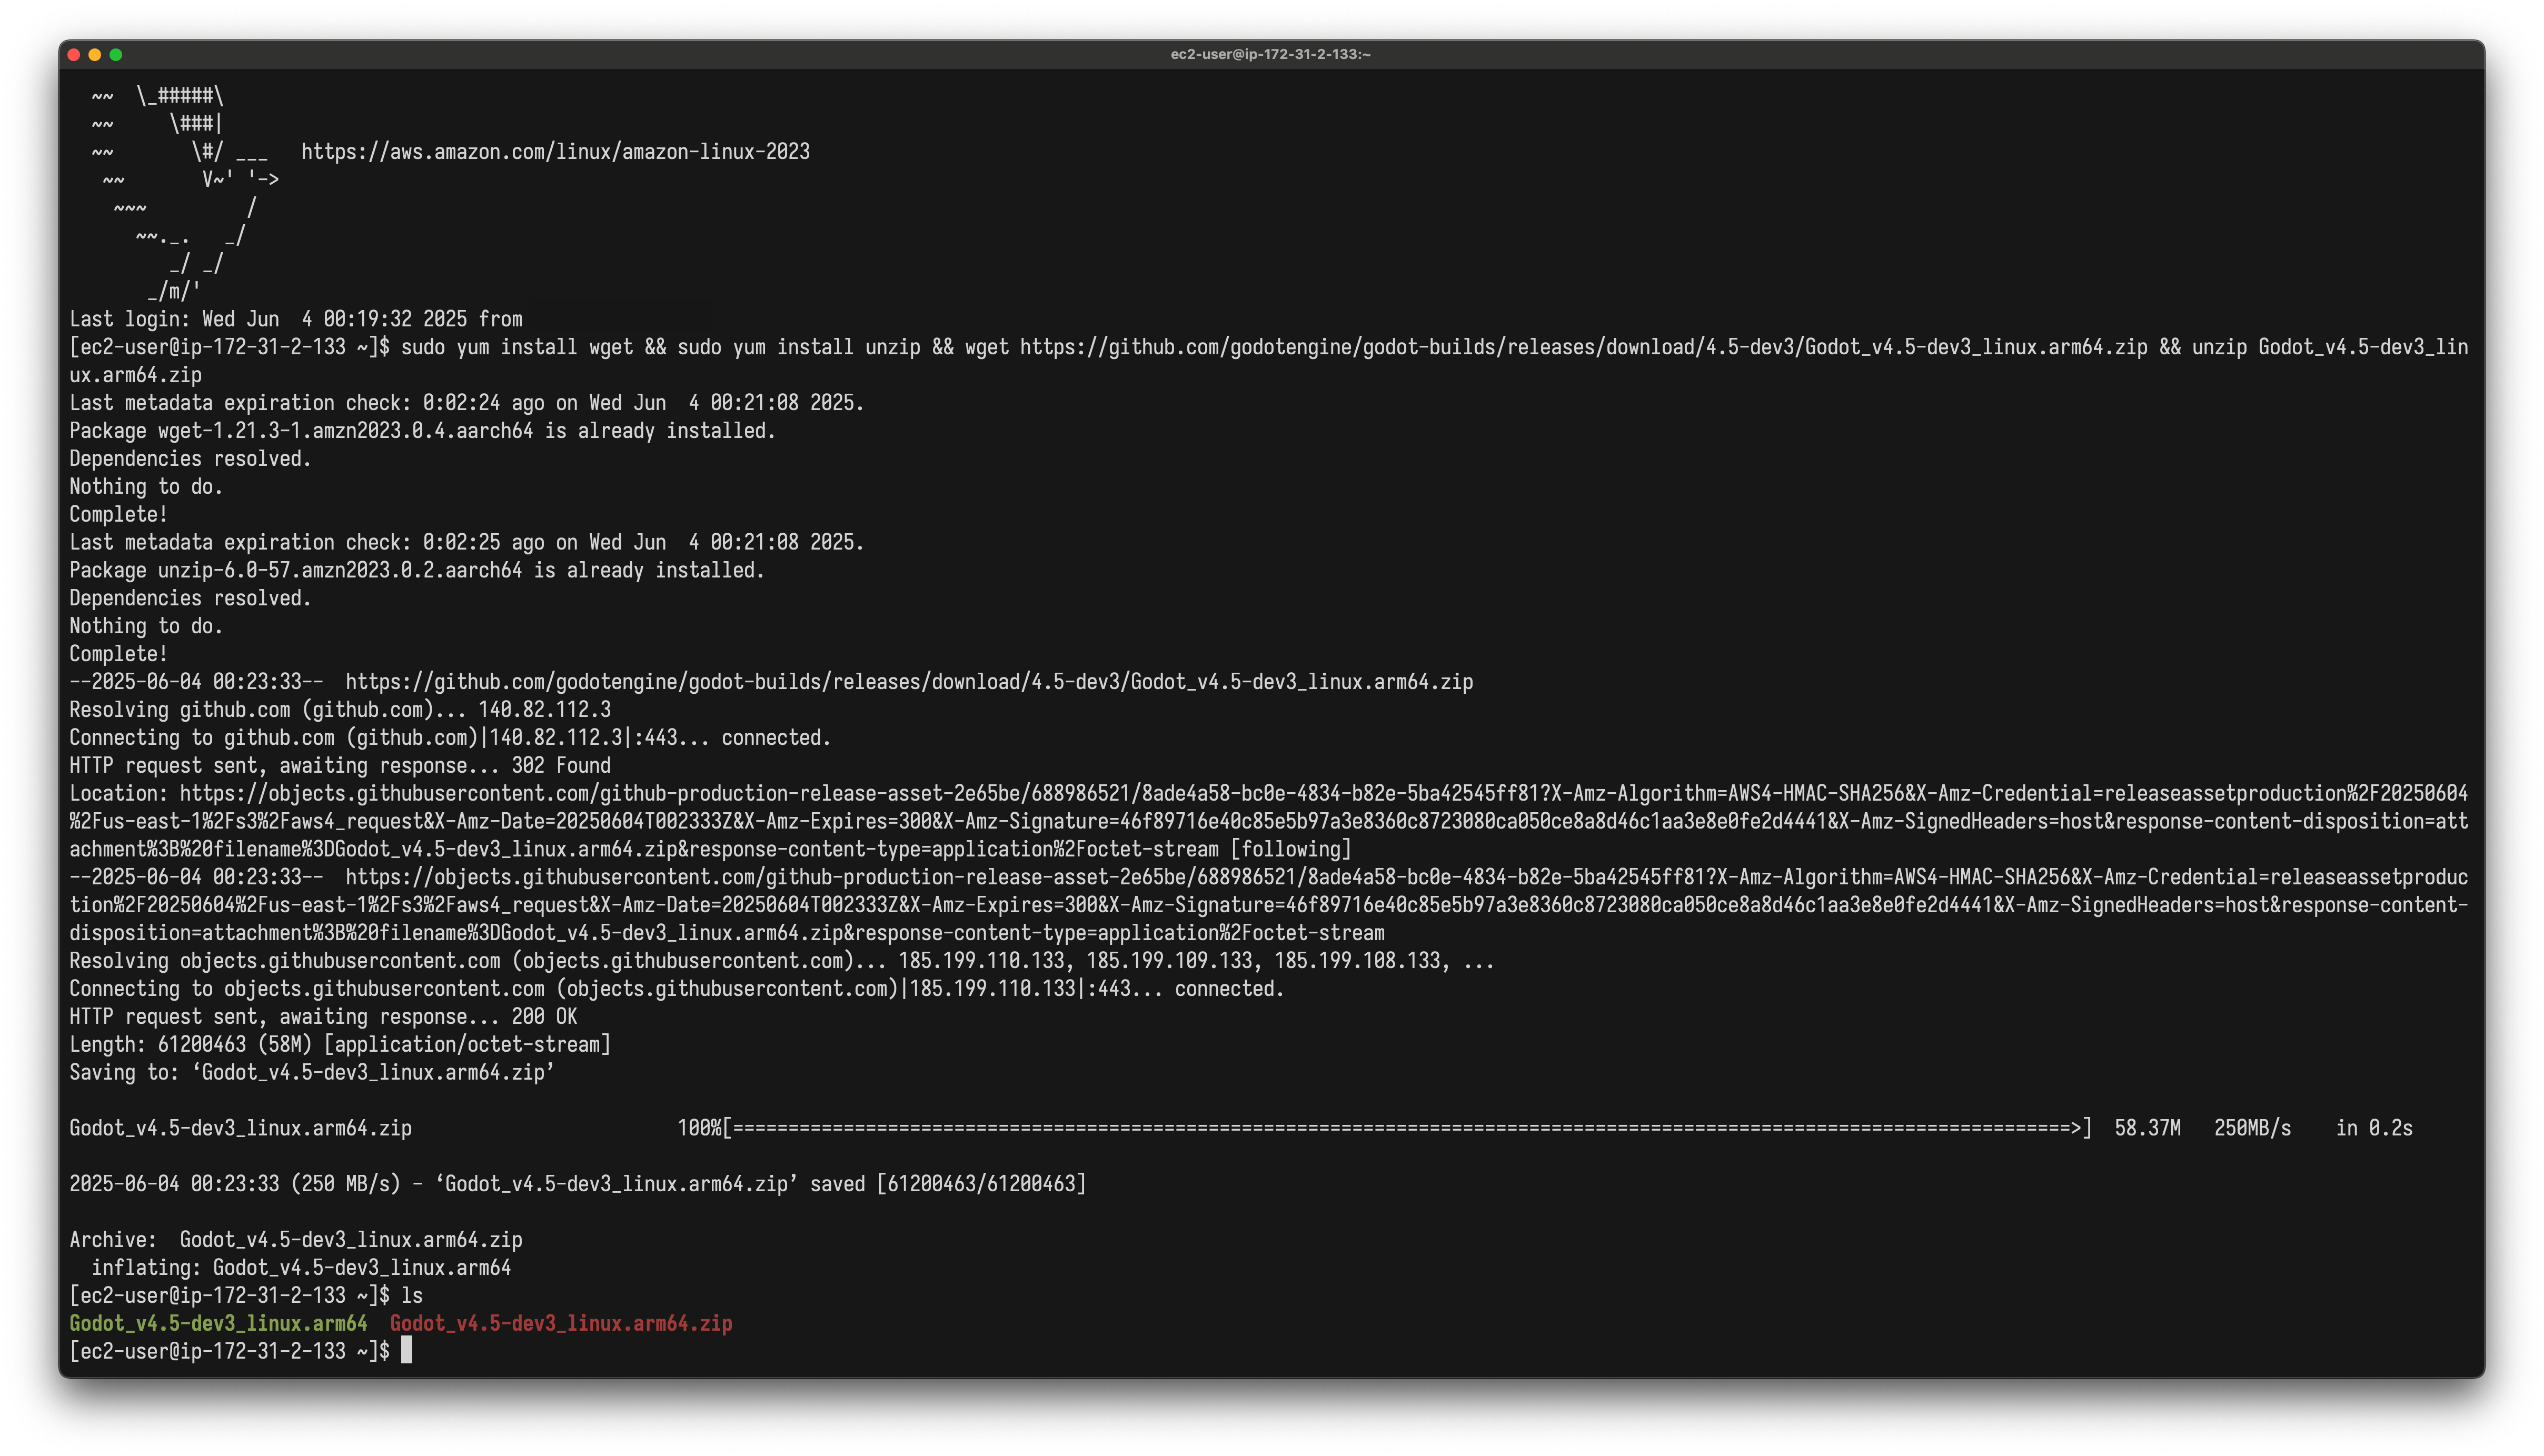
ssh -i "godot_example.pem" ec2-user@YOUR_ELASTIC_IPto connect to your EC2 - You should see:
   ,     #_
   ~\_  ####_        Amazon Linux 2023
  ~~  \_#####\
  ~~     \###|
  ~~       \#/ ___   https://aws.amazon.com/linux/amazon-linux-2023
...
- Now in the EC2, run this to download Godot to the EC2 & unzip it:
sudo yum install wget && sudo yum install unzip && wget https://github.com/godotengine/godot-builds/releases/download/4.5-dev5/Godot_v4.5-dev5_linux.arm64.zip && unzip Godot_v4.5-dev5_linux.arm64.zip
- (Note: Consider replacing the 2 instances of
4.5-dev5with your preferred Godot version!) - Type
exitto leave the EC2
Godot Exporting Steps 📷
- Open your Godot game
- Go to Project -> "Export..."
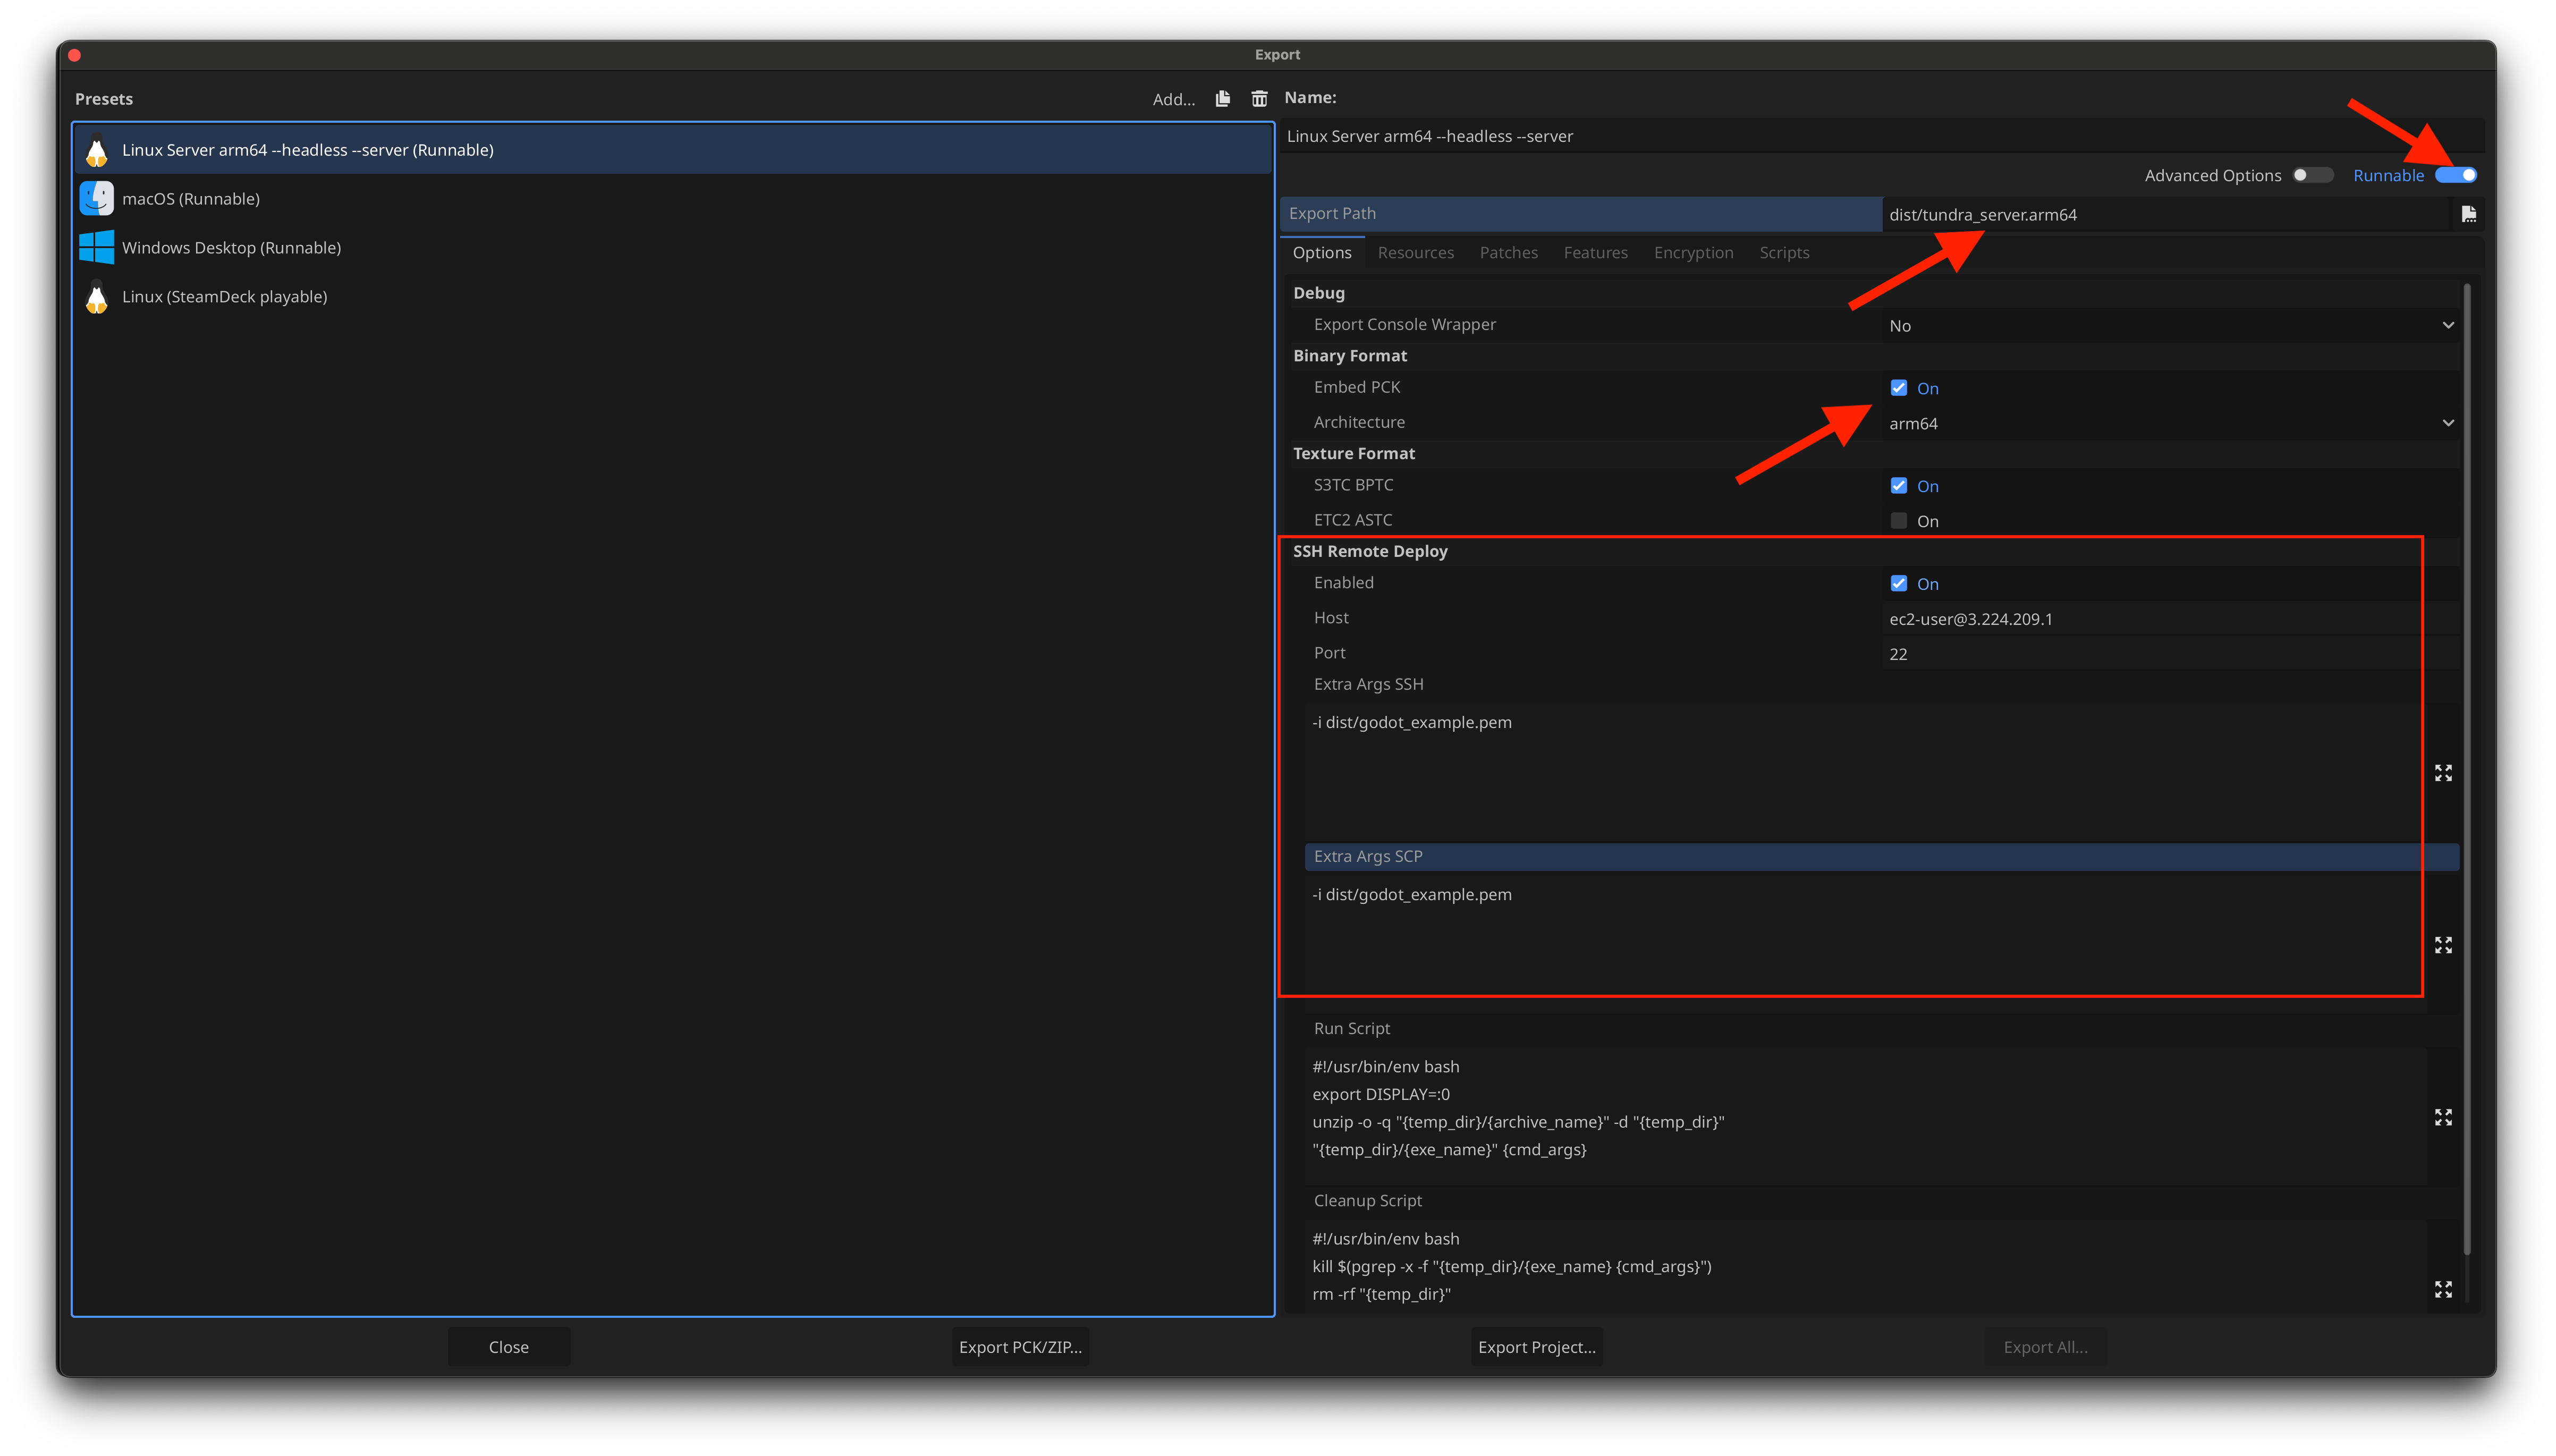
- Add a new Export preset (Linux)
- Name:
Linux Server arm64 --headless - Export path:
dist/tundra_server.arm64(use your game name) - Check Embed PCK
- Architecture:
arm64 - (Optional) Enable SSH Remote deploy and add extra args (Enables the remote debug button in top-right of the editor)
- If you enabled it, you can click the Remote Debug icon to deploy & attempt to connect to your IP at this point.
- Select tab: Resources
- Export Mode:
Export as Dedicated Server - Strip Visuals should be inherited to all folders
- Select tab: Features
- Add one in Custom (comma-seperated):
server - In your game code, add something like this to auto start the host because we included the
serverfeature above.
- Name:
func _ready():
    if OS.has_feature('server'):
		print("Calling host game for dedicated server setup...")
        # Note: your host command may be different, but it should start the host locally when called.
        ...
        ...
        host()
Upload and run your server 📷
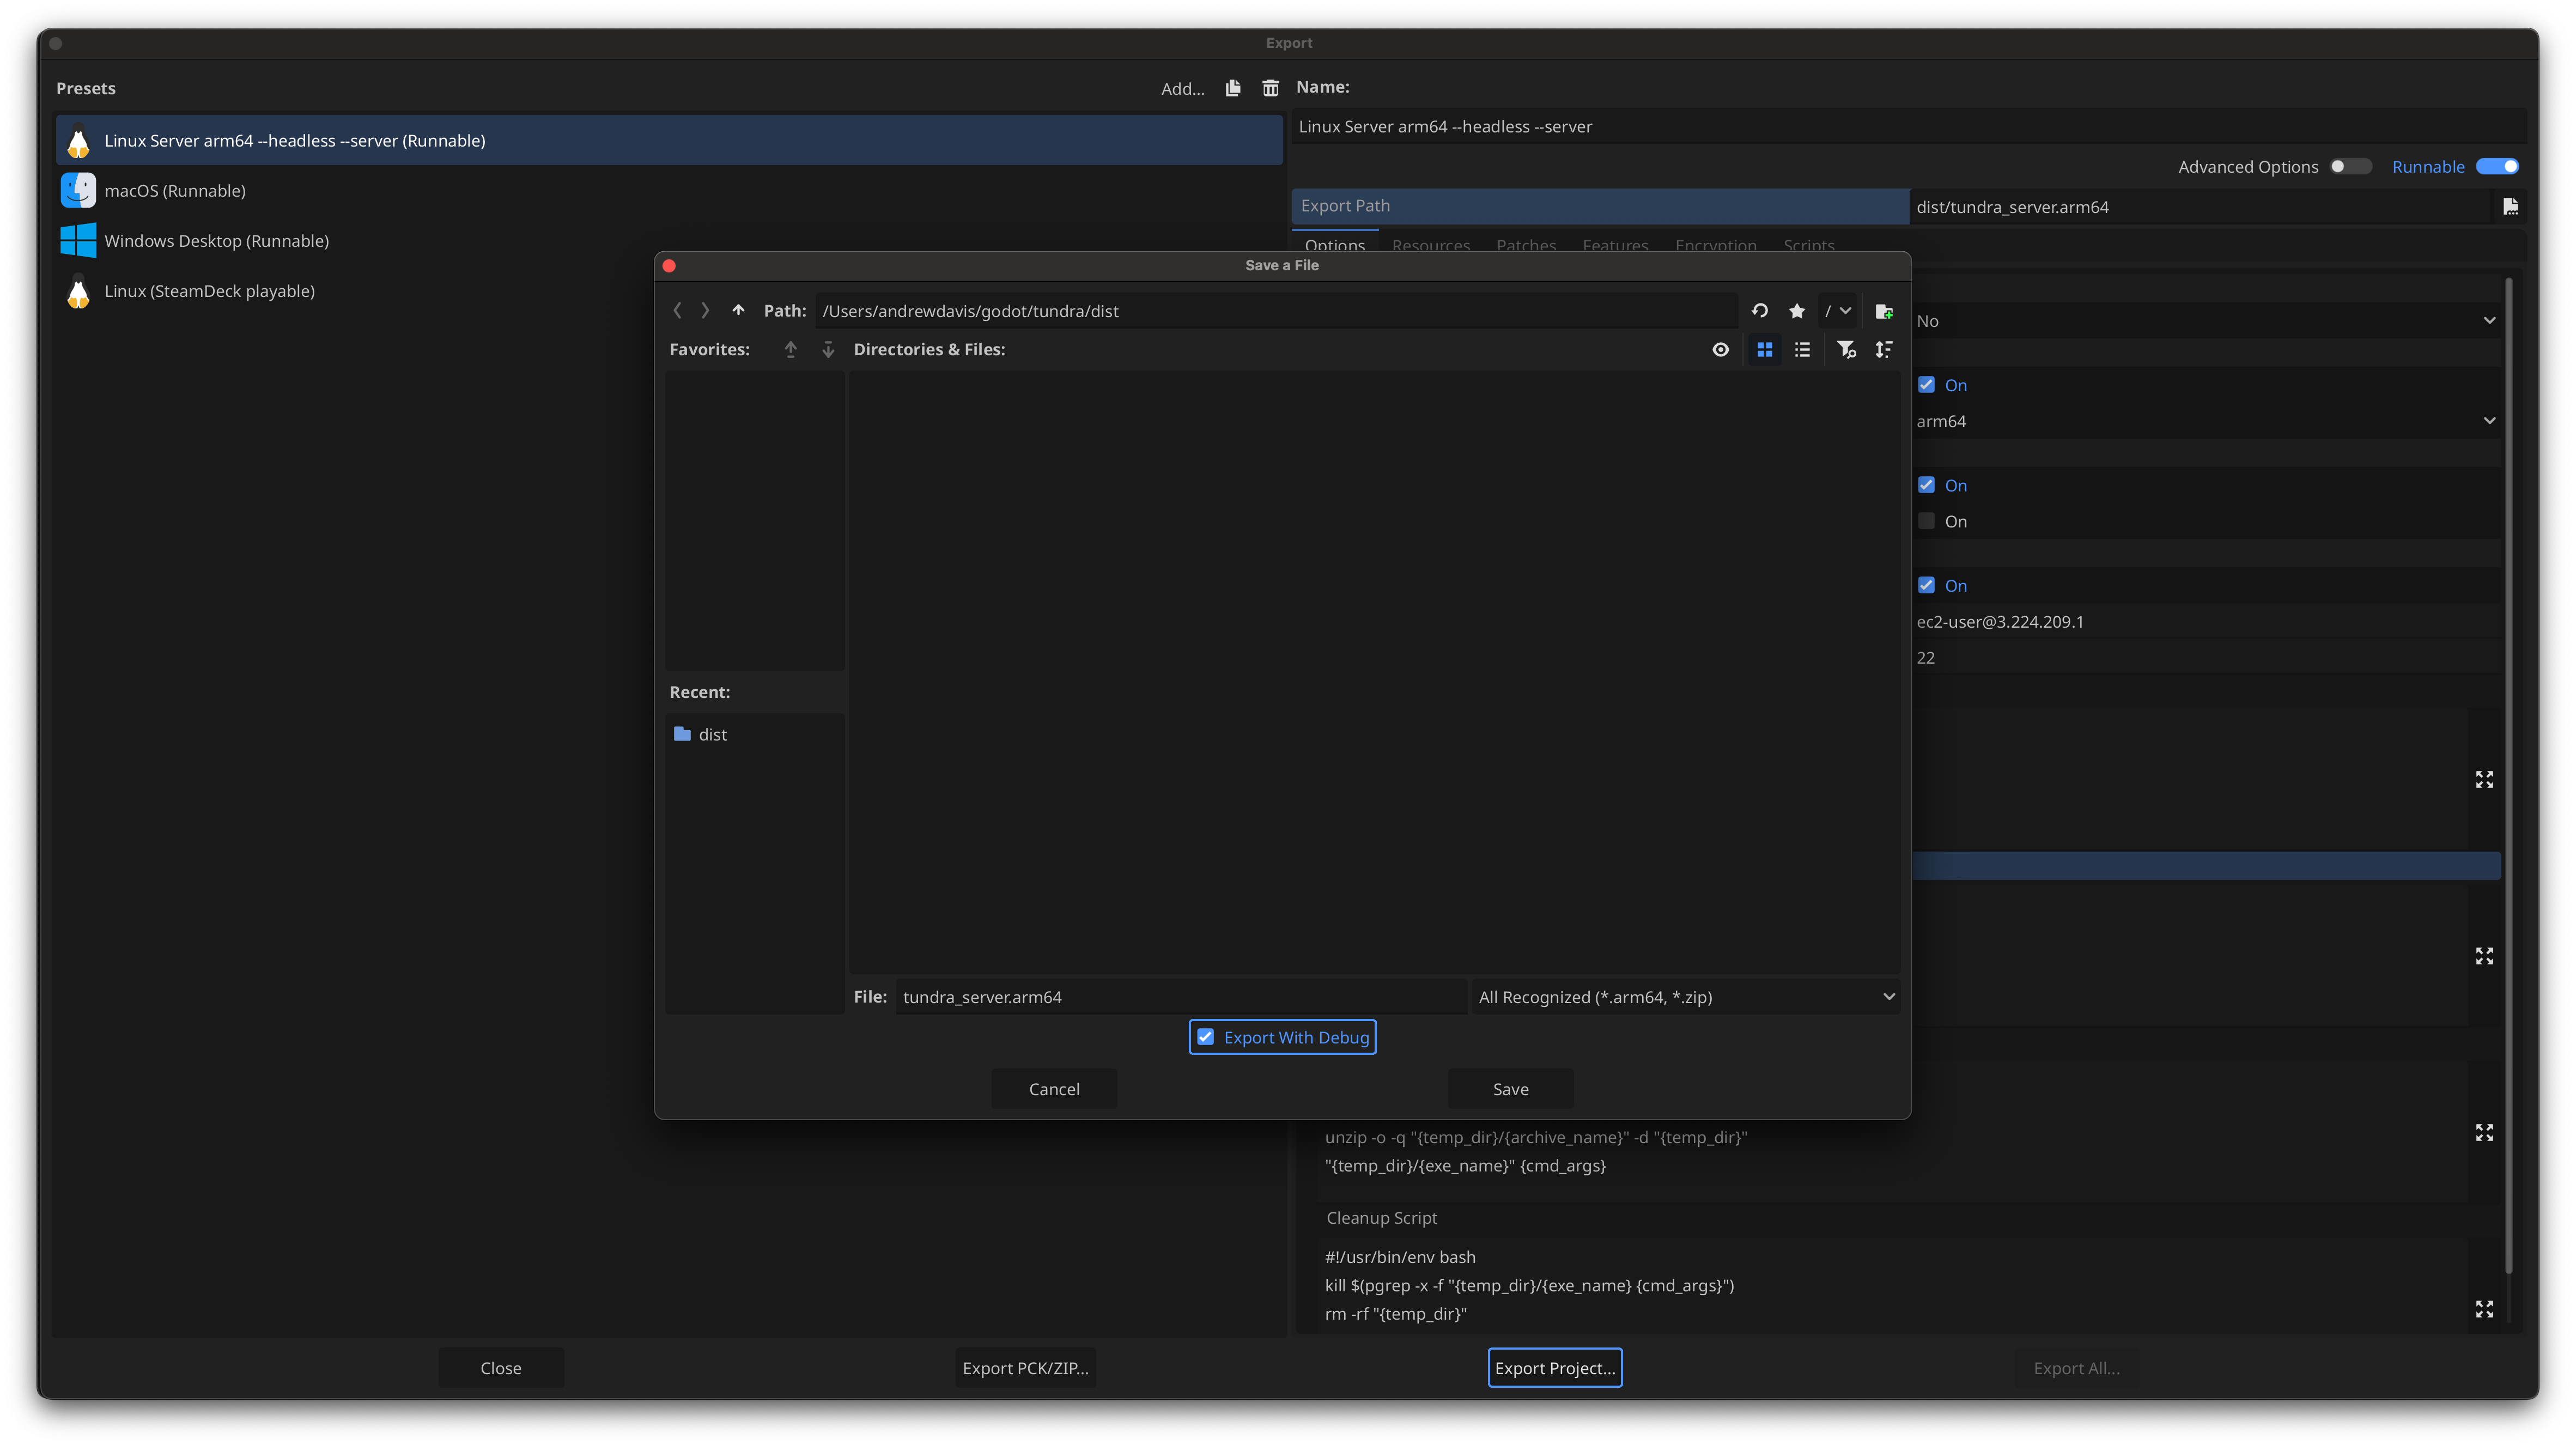
- Go to Project -> Export
- Select the preset we made
Linux Server arm64 --headless - Export Project
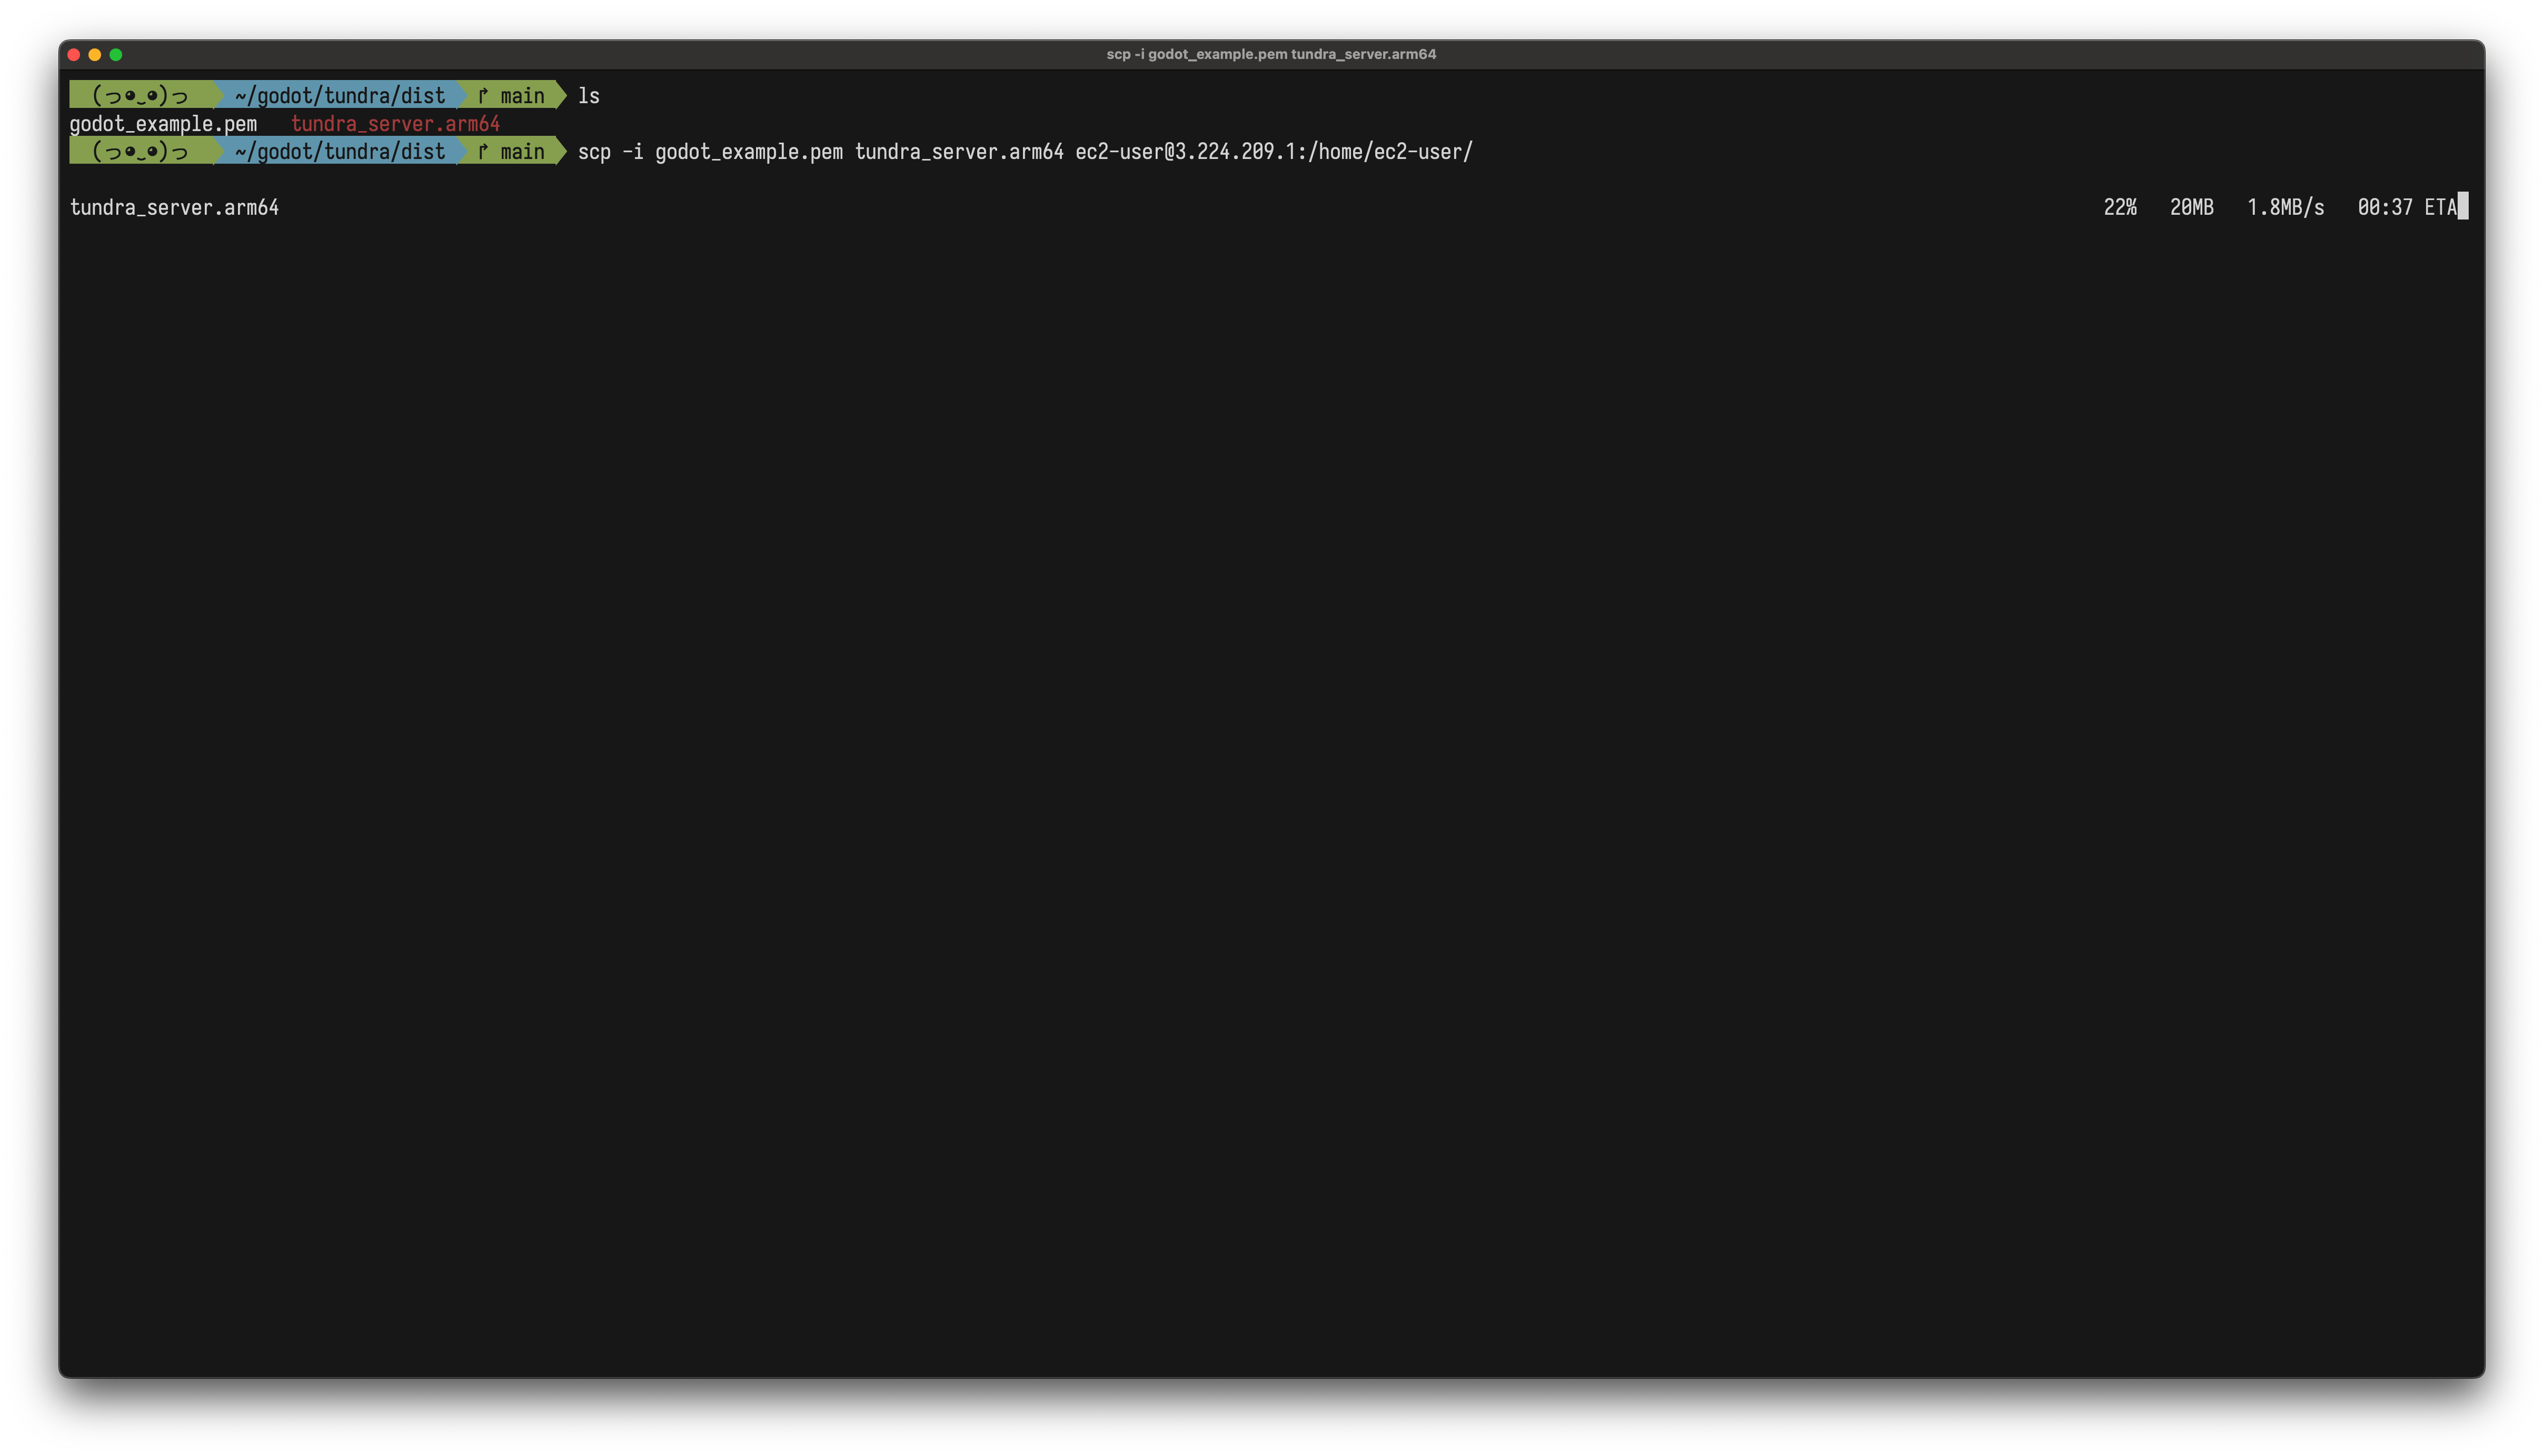
- In your terminal, cd to
/dist - Run:
scp -i godot_example.pem tundra_server.arm64 ec2-user@3.224.219.2:/home/ec2-user/to upload your server - Run:
ssh -i "godot_example.pem" ec2-user@3.224.219.2to log in to the EC2 again - In the EC2 run:
lsto make sure your files are there - Should see these 3:
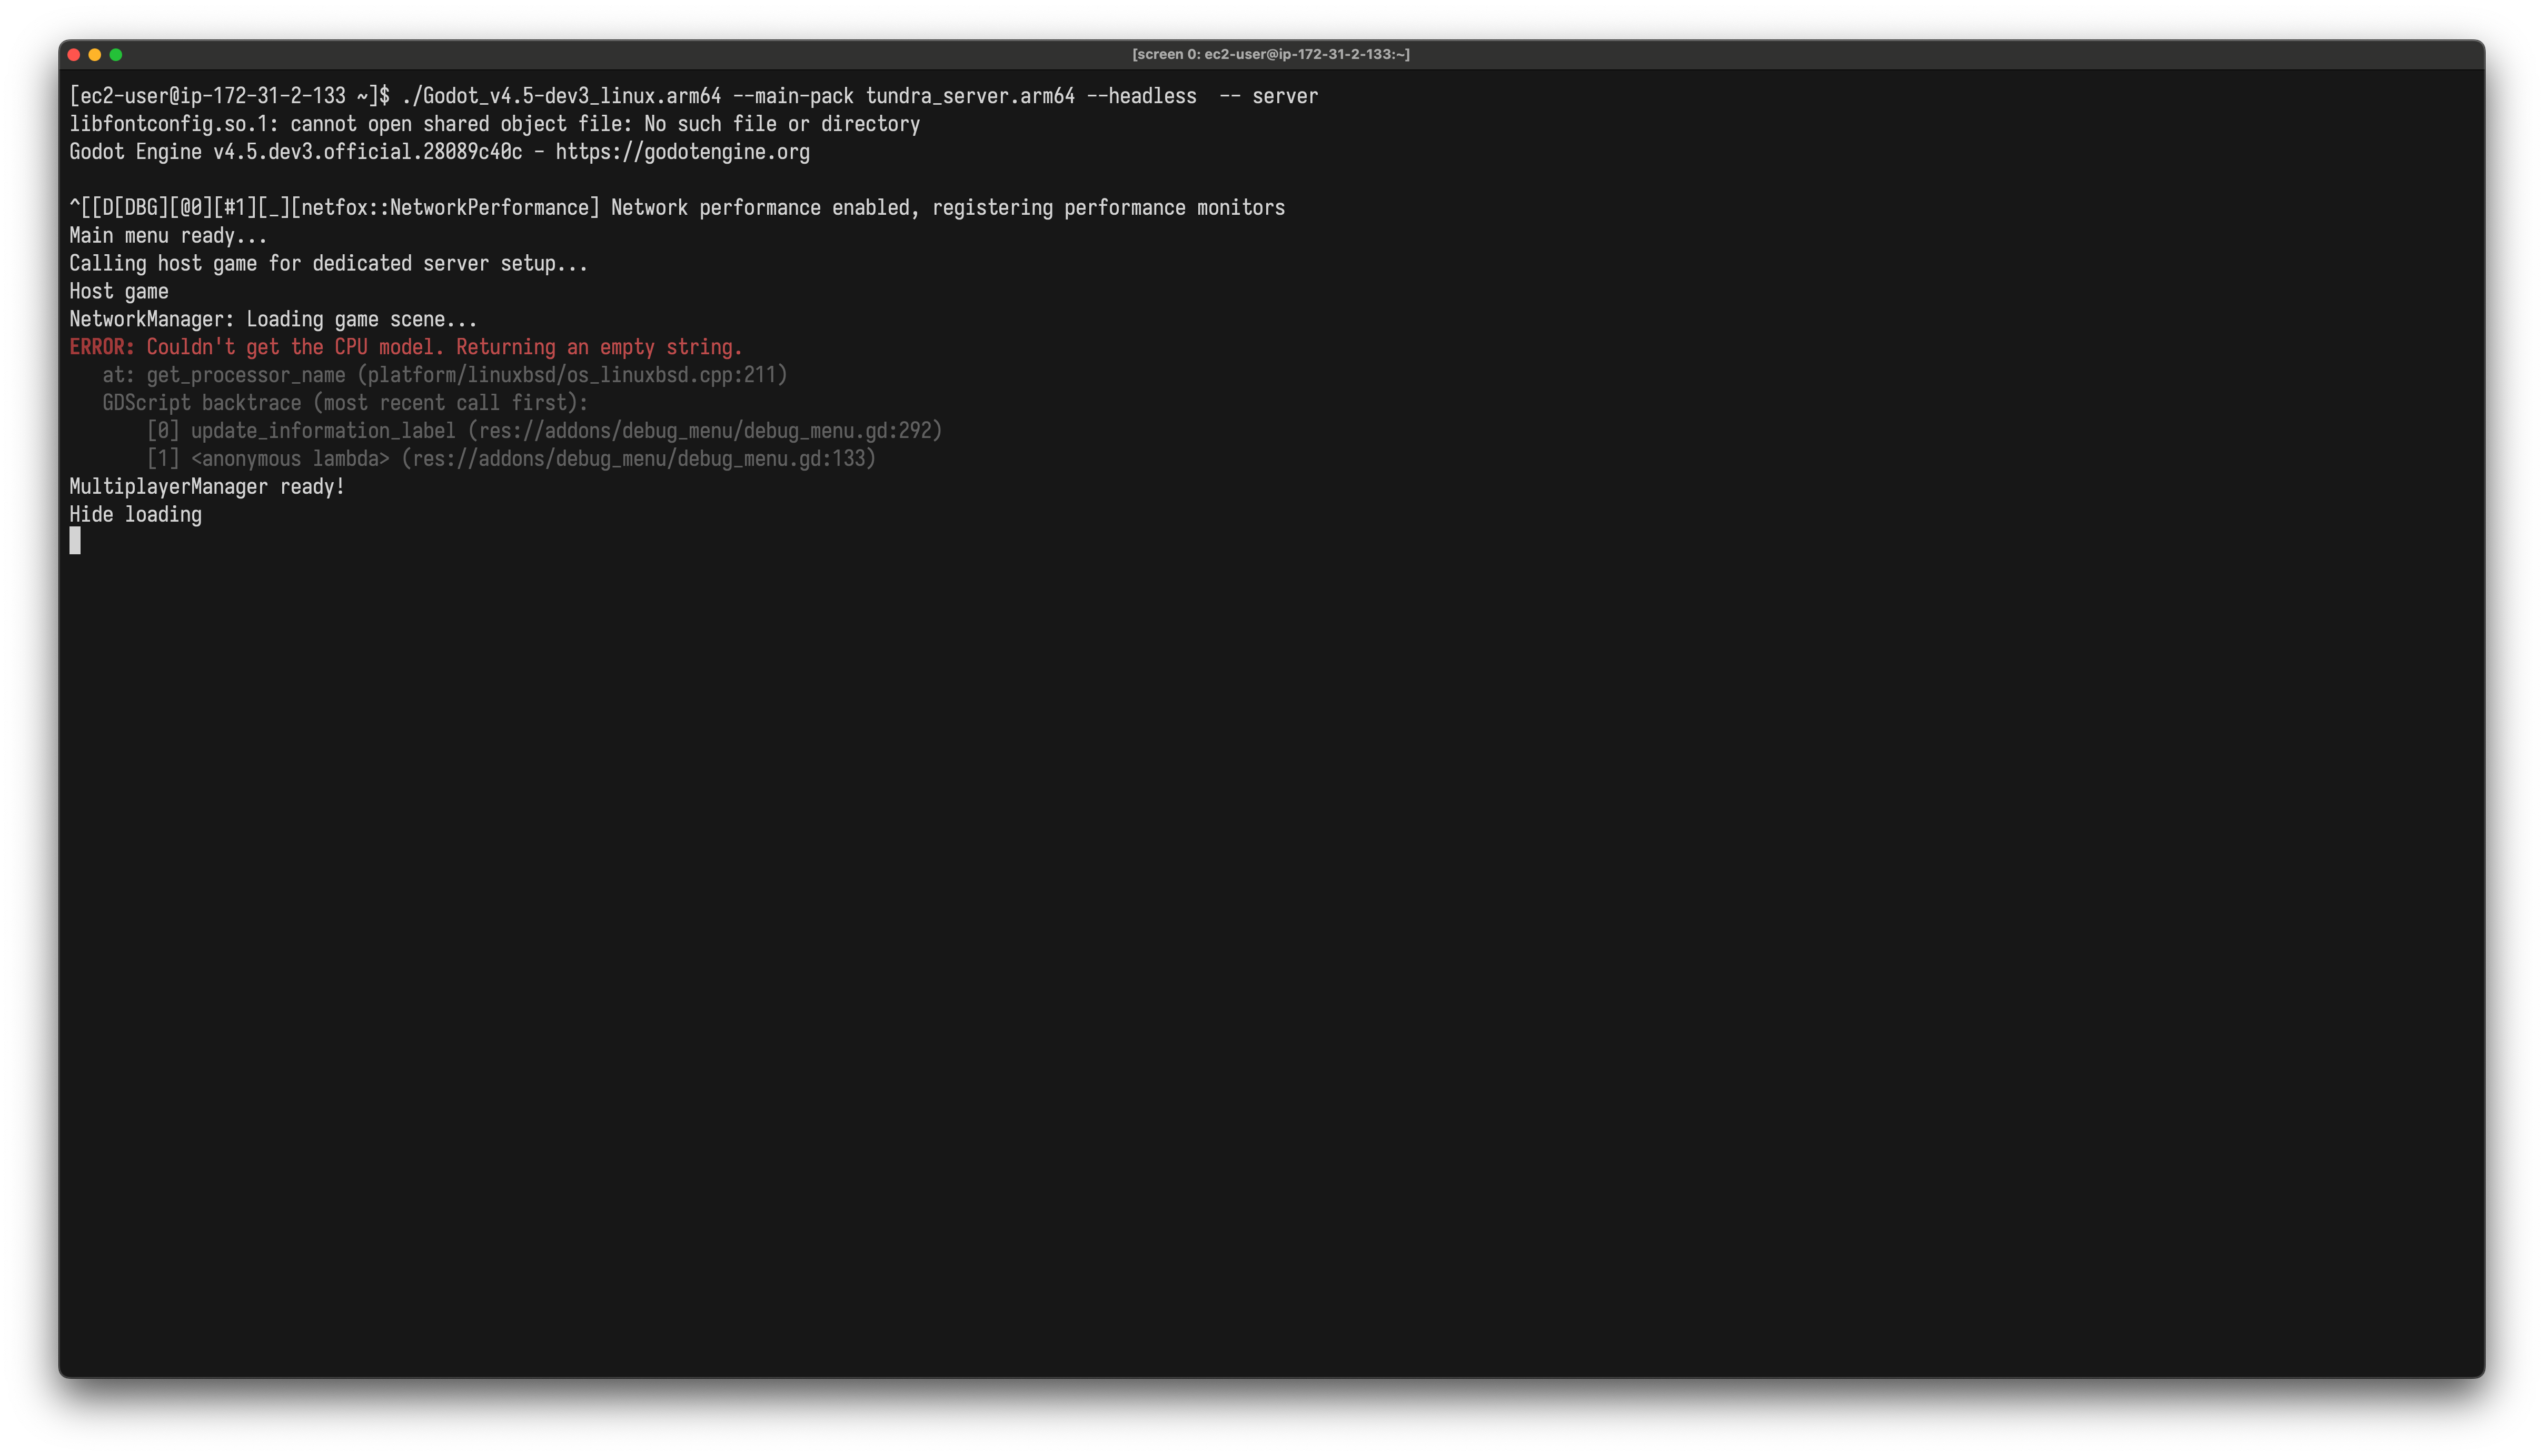
Godot_v4.5-dev5_linux.arm64 Godot_v4.5-dev5_linux.arm64.zip tundra_server.arm64 - Run:
screen, you're now in a new terminal session - Run:
./Godot_v4.5-dev5_linux.arm64 --main-pack tundra_server.arm64 --headless - On your keyboard:
CRTL + Aand thendto detach the screen, it's now running in the background, so you're able to log out - Type
exitto close your connection to the EC2 - (Note 1: These steps are all you need for updates to your game server)
- (Note 2: To restart your server after uploading a new version
sshin and typescreen -rto get back to your most recent screen,CRTL-Cto stop it, andCRTL + Aand thendto leave again after you restart it)
Final step:
- Run your game from the Godot editor or as an
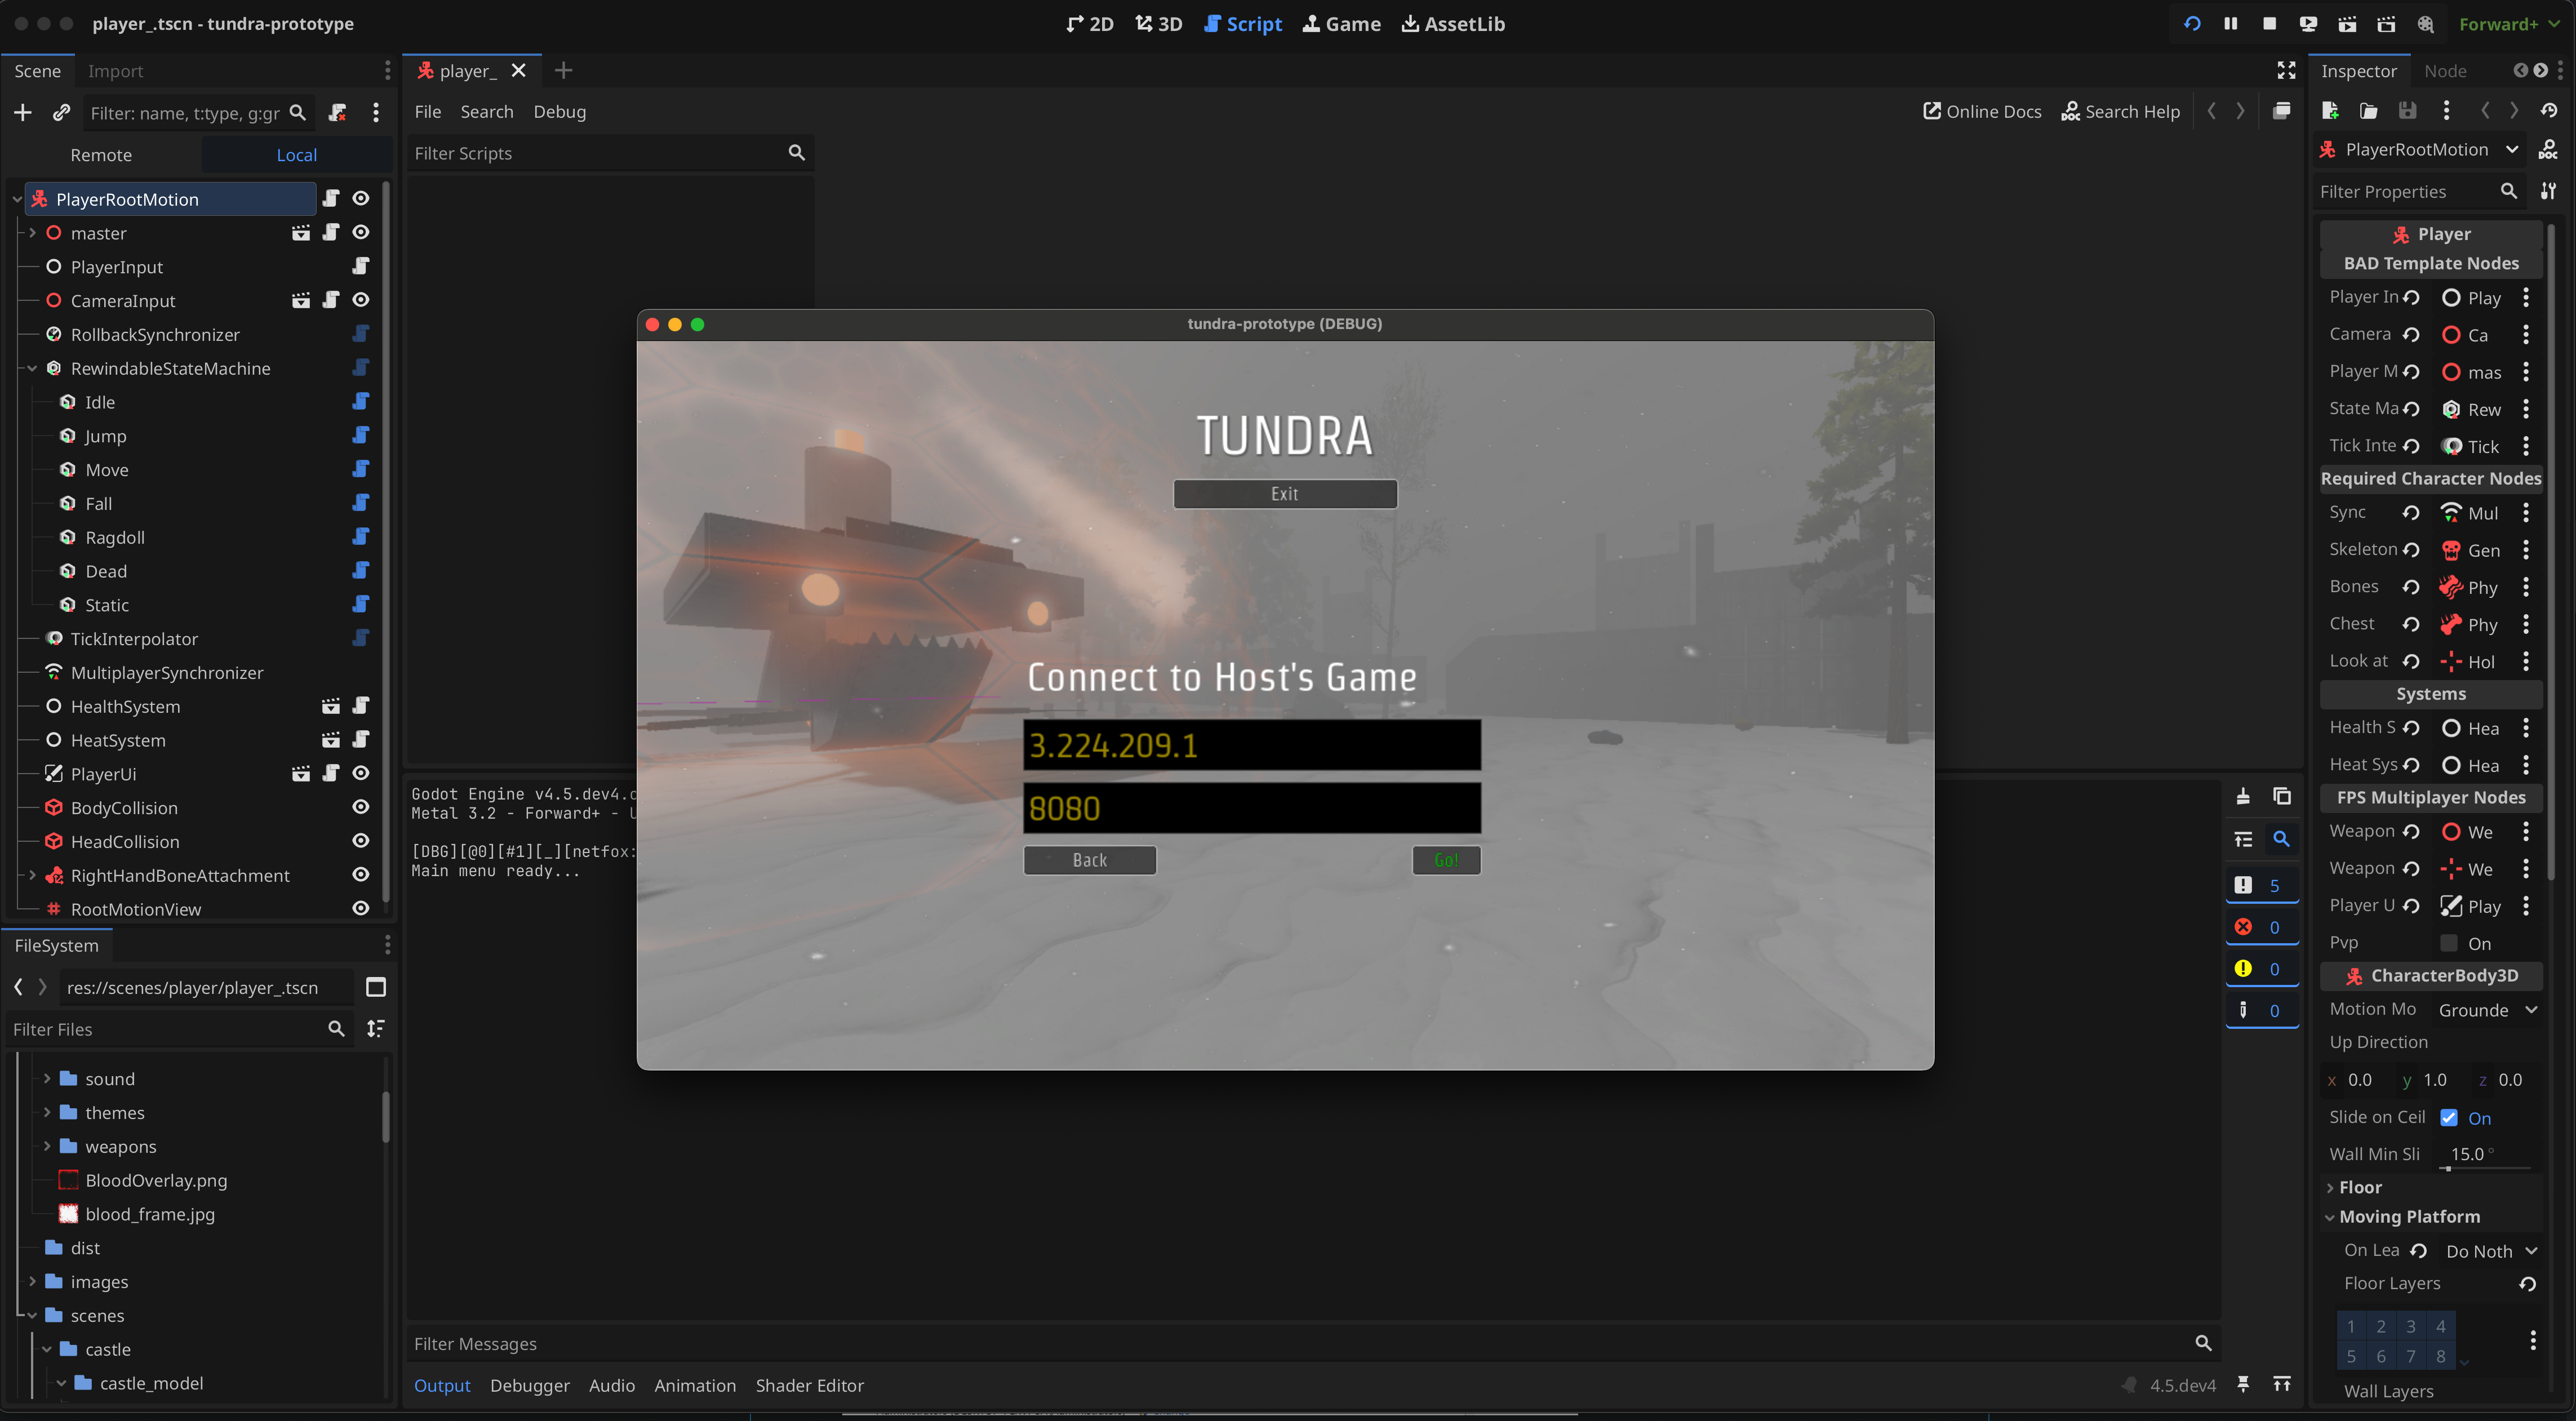
.exeor export of your choice - Join
- Paste in your Elastic IP
- Go
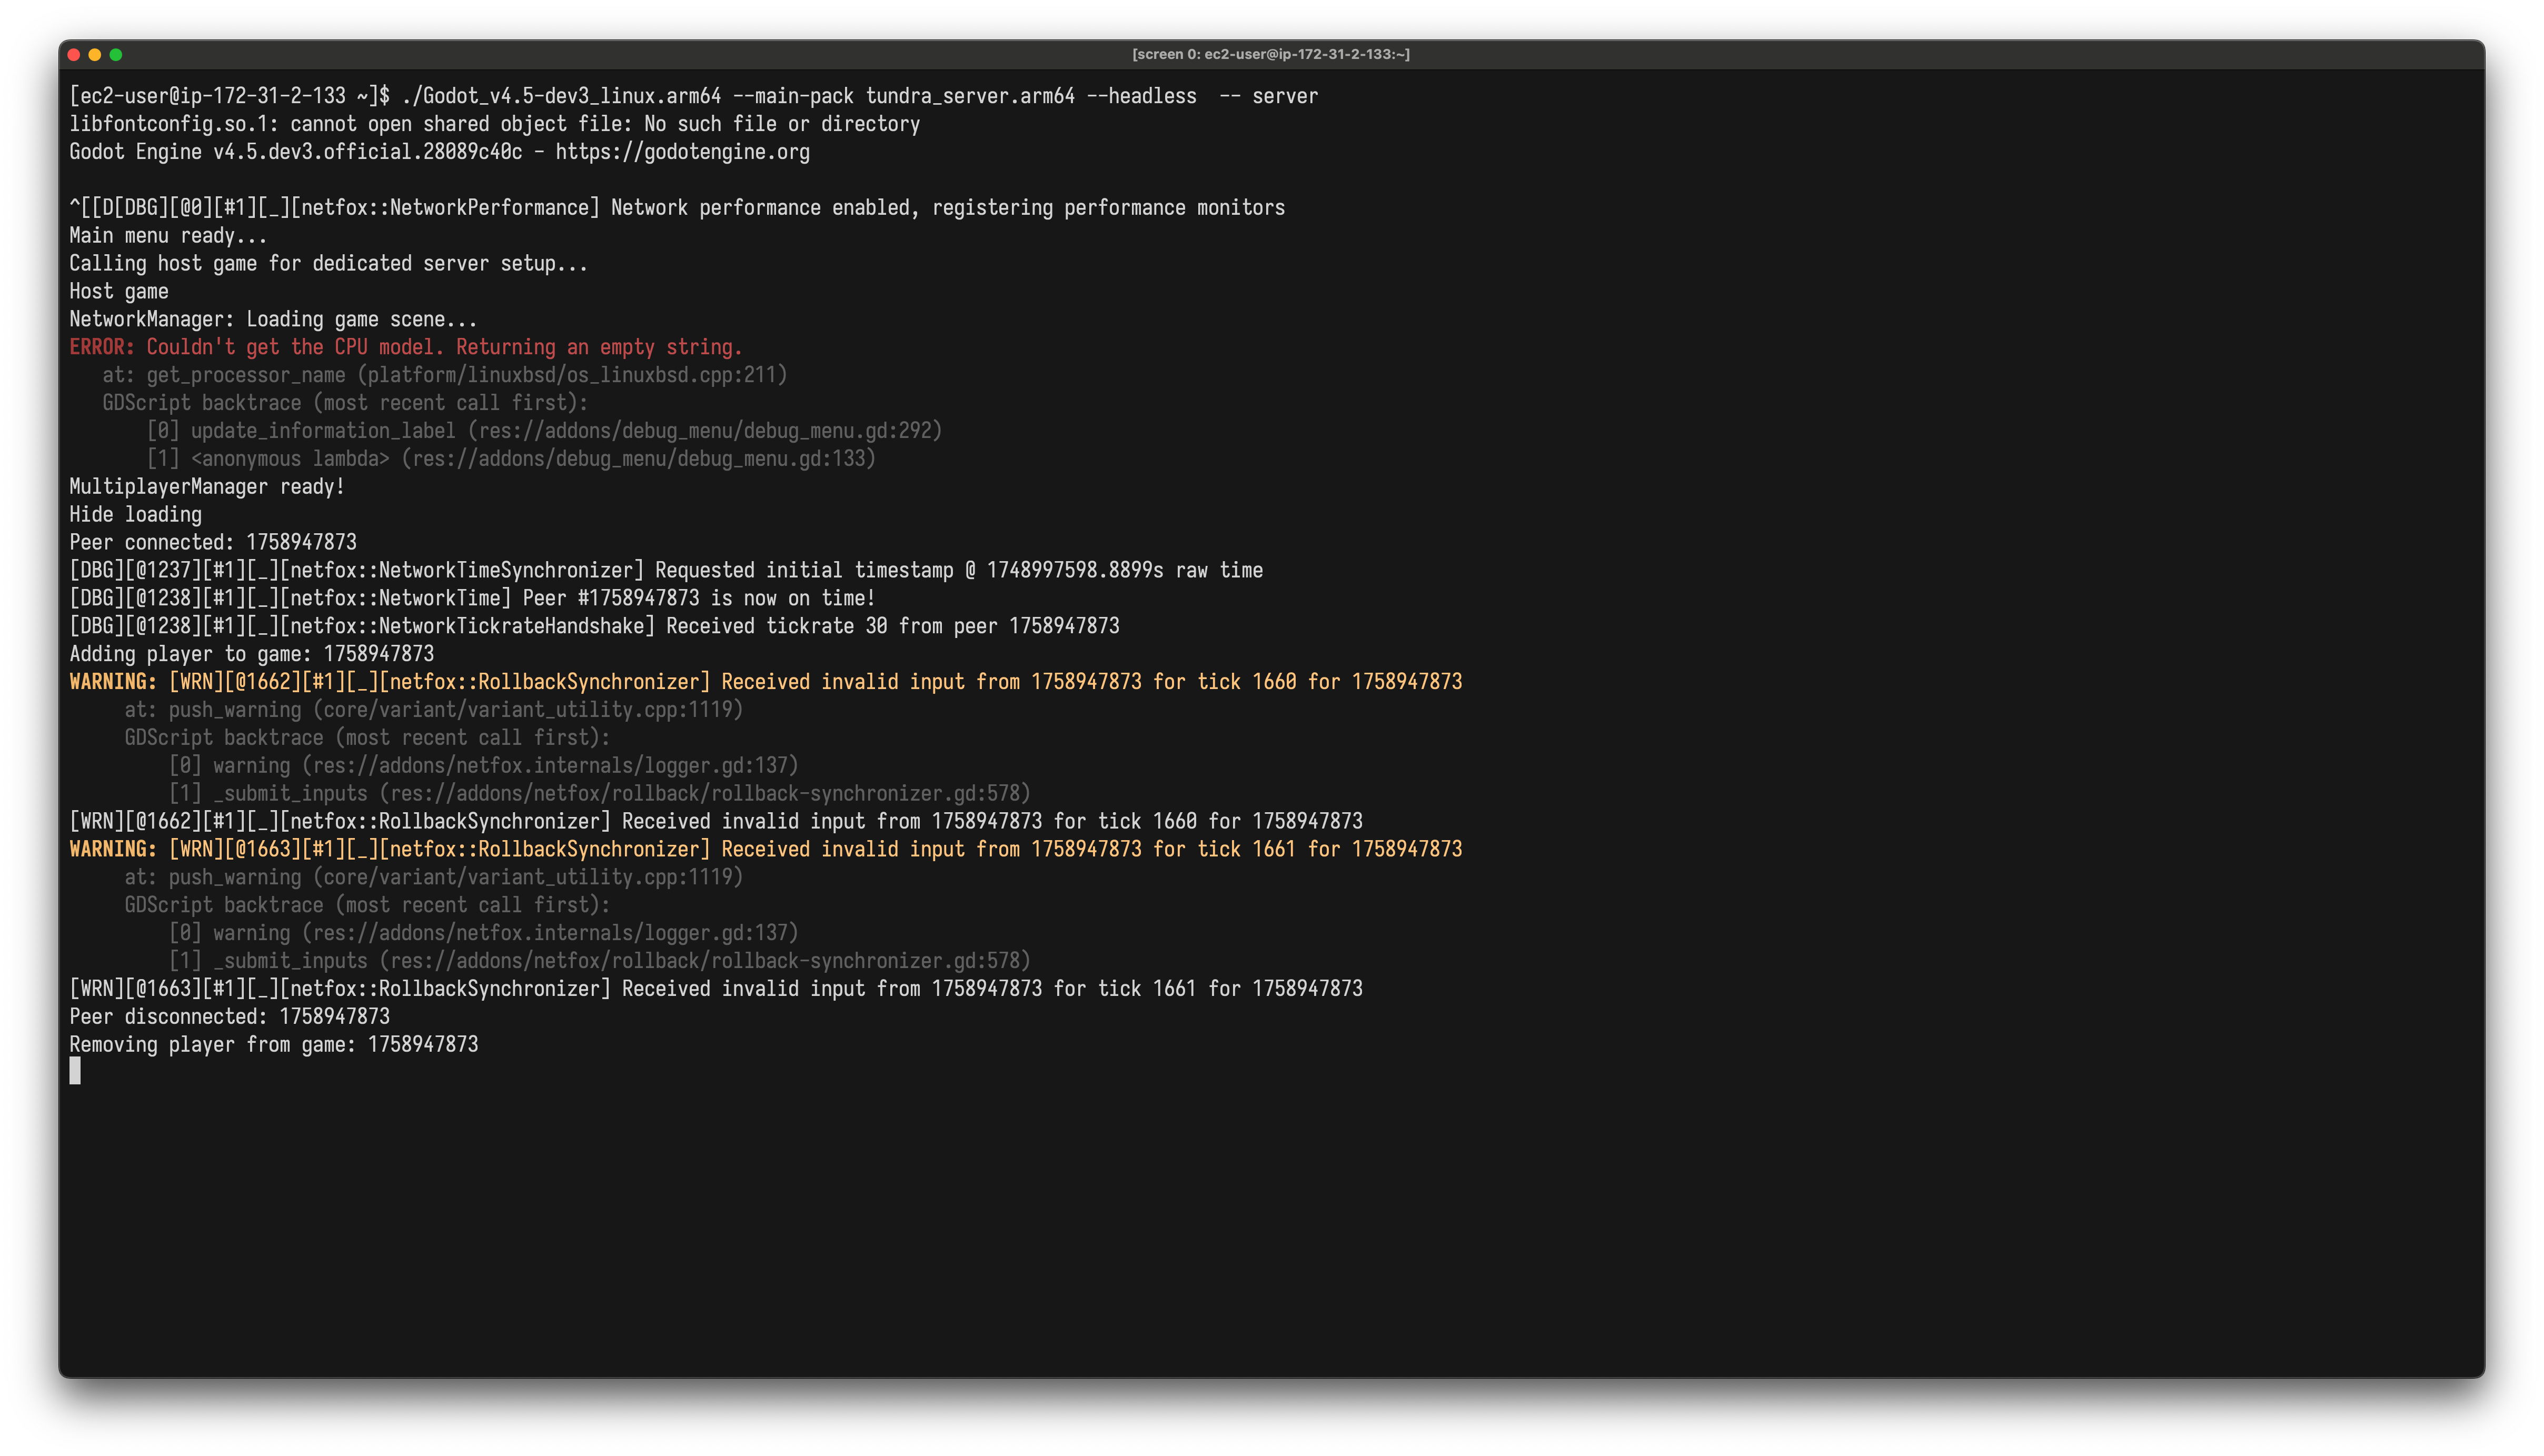
This is what it looks like when I join my game, Tundra (I prefill the Elastic IP in my game for easy testing for now):
Here are all the steps as images, in order. I may make a video or carousel, but this works for now. If you copy the commands from above and follow these visuals, you'll get there.
AWS: Create security group, EC2 instance, and Elastic IP

Commands in your terminal


Export from Godot to Linux as a dedicated server

Upload to the EC2 with scp and run in the background on the EC2 using screen

Footnotes:
** The AWS steps could apply to other cloud host providers like Digital Ocean or GCP (my costs are currently $3.00 per month on AWS). Note on our choice of t4g.nano: I chose the smallest 64-bit (Arm) architecture because it can save on costs with the CPU usage we expect. ARM is just slightly more efficient. You can use an x86 architecture, like a t2.micro, but you'll need to change many of the commands and carefully look at the Export options in Godot. x86 is the default export in Godot for Linux.
You can use the network profiler to estimate how much bandwidth you'll need. Some of the slightly larger instances come with better network throughput, though my game takes about 25 kB/s for each connected client, averaging about 100 KB/s on the server with 4 people connected. By my calculations I'm unlikley to run up against the limits, but I'll update this when I move to a more robust architecture. This set up is designed to be applicable to a variety of use cases, like a home server. Another cool note: I was able to use ssh and scp to export it to & then run a client on my Steam Deck!